To install vCenter Server the vCenter Inventory Service is a prerequisite. I was going to gloss over the fact that I know nothing about the Inventory Service, current or previous version, but still thought it best to raise that fact. There is just so little information out there on it. Having recently done my VCP there was no mention of this function. VMware’s website has excellent technical documents but they fall short on explaining anything to do with the Inventory Service. For a component that is so predominant in the installation process it’s surprising.
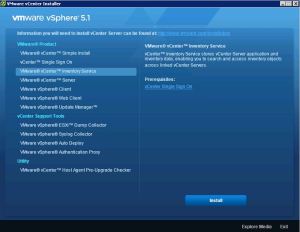
The only explanation I have on it is what’s on the installation screen 🙂 Make of it what you will.
“vCenter Inventory Service stores vCenter Server application and inventory data, enabling you to search and access inventory objects across linked vCenter Servers.”
To begin the installation mount the vSphere media and run the installer. Select the option to install VMware vCenter Inventory Service.
Fight your way through the license and patent agreement screens as usual. Then click next to start the Installation wizard.
In my case I am upgrading my previous vSphere 5 version but a clean install is virtually identical with the exception of the below screen which prompts to either do not override or replace the database. I’ve chosen to not override.
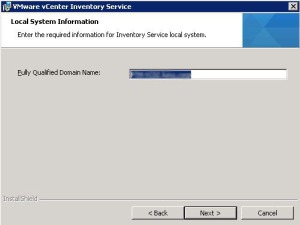
Enter in your FQDN of the local system. In most, bar large installations, this will be the same system as your SSO and vCenter host. If you’ve read my previous post on SSO and FQDN (http://wp.me/p1BmCN) you’ll know that DNS records are extremely important for a proper working SSO and vCenter implementation.
Accept all the default ports. Unless you have security concerns or you’re traversing firewalls there’s little reason to change them.
Select the best size of your ESX environment. Try to foresee what your future requirements will be and match that. In my case I’ve selected medium.
This next screen relates to the new Single Sign On feature of vSphere 5.1. Leave the default administrator user and enter in your master password you set during the installation of Single Sign On. For the Lookup Service URL enter in your SSO server. This will most likely be the same host. Use the FQDN and the port. By default the localhost is filled in so hopefully no change will be needed.
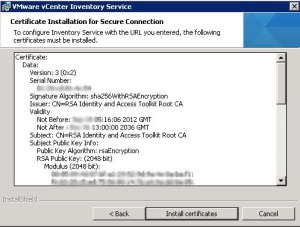
Next you’ll be presented with a Self-Signed certificate. To proceed click Install certificate.
That’s all. A little simpler than Single Sign On DB creation and installation. Next you can finally install the vCenter Server with the prerequisites out the way.


0 thoughts on “Installing vSphere 5.1 – vCenter Inventory Service”