I remember downloading the Google Authenticator app from the Google Play store the day it came out. Since that time I never once even ran the app. I just couldn’t be bothered setting it up with any websites, that was until now.
When I heard about a VMware Fling to bring Google Authenticator two-factor authentication to ESXi last week I wanted to try it out as fast as I could. So today I played around with it and it works great! So I noted down what I did and uploaded it all below. There’s really only one requirement and that’s ESXi 5.0 or above. True the instructions are on the Flings site but I thought I’d put them into my own words.
The first thing I did before I even started was make sure my host was using a good NTP time source and the time was correct.
Download the ESXi Google Authenticator zip file and extract the VIB file from it. (link below)
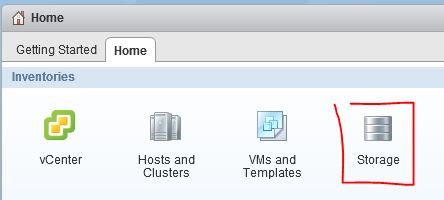
Upload the VIB to the ESX host. I just used the vSphere Web Client and clicked on Storage under Inventories on the Home page.
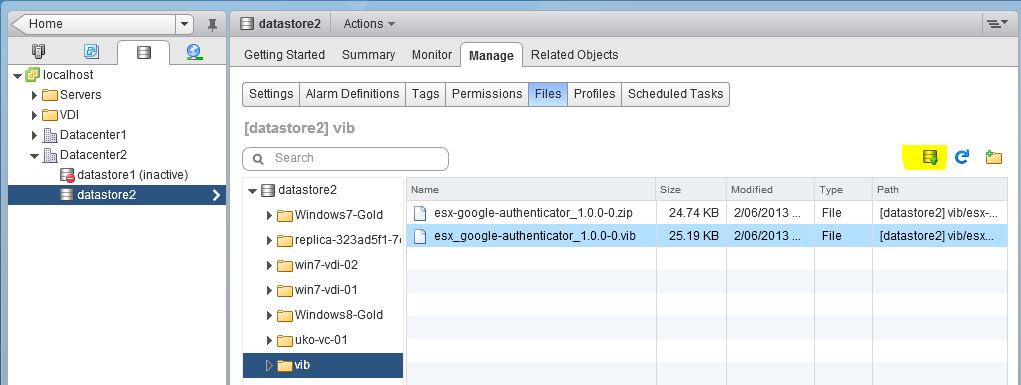
I then located a Datastore that my host had access to. I created a folder called vib. I then clicked the Upload a file to the Datastore icon. Selected the VIB and clicked Open. (I also tried using the zip file without extracting the VIB but couldn’t get it to work so give that a miss)
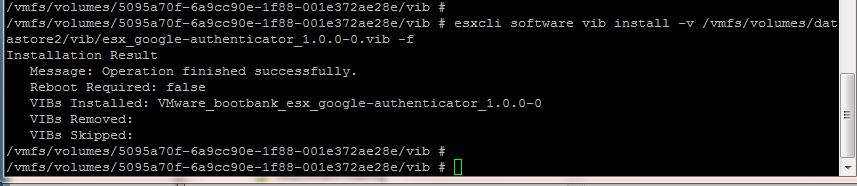
Next I installed the VIB on the host using the ESXCLI. Normally I would use the Management Assistant for this but because I’m playing around with authentication I was on the console of the host. Replace the path of where you uploaded the VIB.
esxcli software vib install -v /vmfs/volumes/datastore2/vib/esx_google-authenticator_1.0.0-0.vib -f
If successful you should receive output similar to below.
Next you need to execute the command ‘google-authenticator’
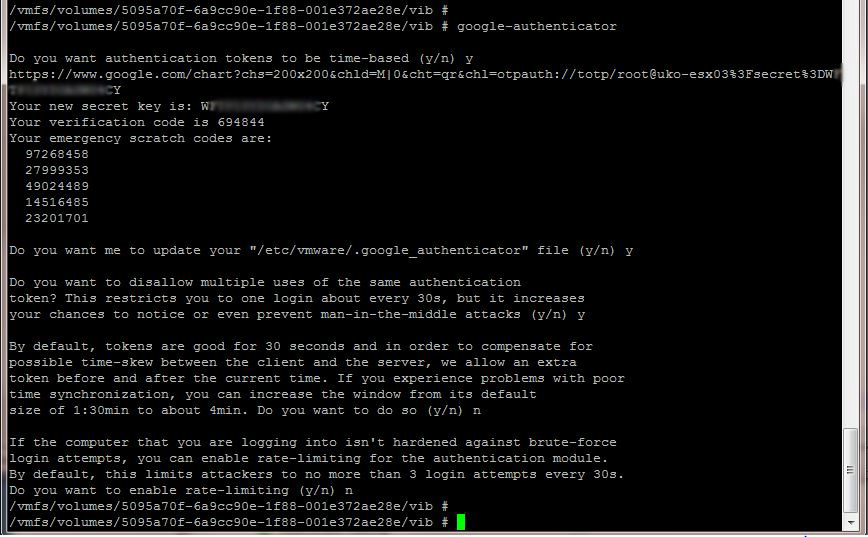
A short wizard will run with a series of questions on how you would like to setup the authenticator. Each environment may influence how it is set-up. Record down the secret key and also the URL for when the Mobile App is set-up later on.
The Two Factor authentication works with SSH and Shell access. The config process currently is all manual.
First you have to edit /etc/ssh/sshd_config. I used vi from the ESXCLI. Went into Insert mode made the below change and write & quit.
ChallengeResponseAuthentication yes
Next you have to edit /etc/pam.d/sshd for ssh and/or /etc/pam.d/login for console with the first line.
auth required pam_google_authenticator.so
Initially I tried to use vi but couldn’t save so I used sed as shown in the Fling instructions.
sed -i -e ‘3iauth required pam_google_authenticator.so’ /etc/pam.d/sshd
sed -i -e ‘3iauth required pam_google_authenticator.so’ /etc/pam.d/login
For the change to take effect immediately run ‘/etc/init.d/SSH restart’
The change is not persistent after a reboot so for this to happen the above two lines will need to be added to /etc/rc.local.d/local.sh
Finally you have to set up the Google Authenticator app. I used the Android version which I originally downloaded the day after it was released and never used. The Google Authenticator link below has links to iOS and Blackberry apps as well. There’s two ways to add the ESXi host to the app. You can manually add in the ESXi using the Secret Key provided above. Or the easier approach I found was to use the URL that generated above and put that into a web browser. That will load a QR code on the screen. Using a QR reader on the phone scan it and it will automagically load Google Authenticator and add in the ESXi host.
References
Google Authenticator
ESXi Google Authenticator Fling
Android App