Now that PowerShell Core 6 has gone GA, it’s a great time to start learning this new version. So I thought I would put together 5 quick tips and tricks that I’ve used to make using PowerShell Core a little easier for myself while making the transition from Windows PowerShell.
While the intention of this post is not to go into the differences between Windows PowerShell and PowerShell Core. Despite the slightly mixed or vague messaging we getting from Microsoft on the future of PowerShell. I think it’s safe to say that PowerShell Core is not a replacement or upgrade for Windows PowerShell but it is the future of PowerShell. As soon as more and more Modules start supporting PowerShell Core the argument to switch over will become easier.
So while people continue to argue if they should make the switch to PowerShell Core or not here are 5 tips and tricks I have used with PowerShell Core in the meantime. It’s also worth noting that all of these tips are Windows specific.
Tip 1. Modify your default profile.
I wrote a post on this a little while back on how to modify your default profile in Windows PowerShell here. I recommend taking a look at it and bring a bit of yourself to PowerShell. Much of what I discuss in the post is still valid for PowerShell Core. The only different really is your profile path in PowerShell Core.
You can easily locate your profile in PowerShell Core by typing $Profile at the command profile. Unless you’ve already modified it, there’s a good chance that the location path doesn’t actually exist on your PC.
In Windows 10 the path is C:\Users\{username}\Documents\PowerShell\Microsoft.PowerShell_profile.ps1. If it doesn’t exist go ahead and create the folder PowerShell in your Documents folder. Then create a file called profile.ps1 and modify to your hearts content. All the steps are laid out in my previous post I mentioned on modifying your Windows PowerShell profile. Without any specific Core modifications I took my already modified profile.ps1 profile from Windows PowerShell and copied it to this location.
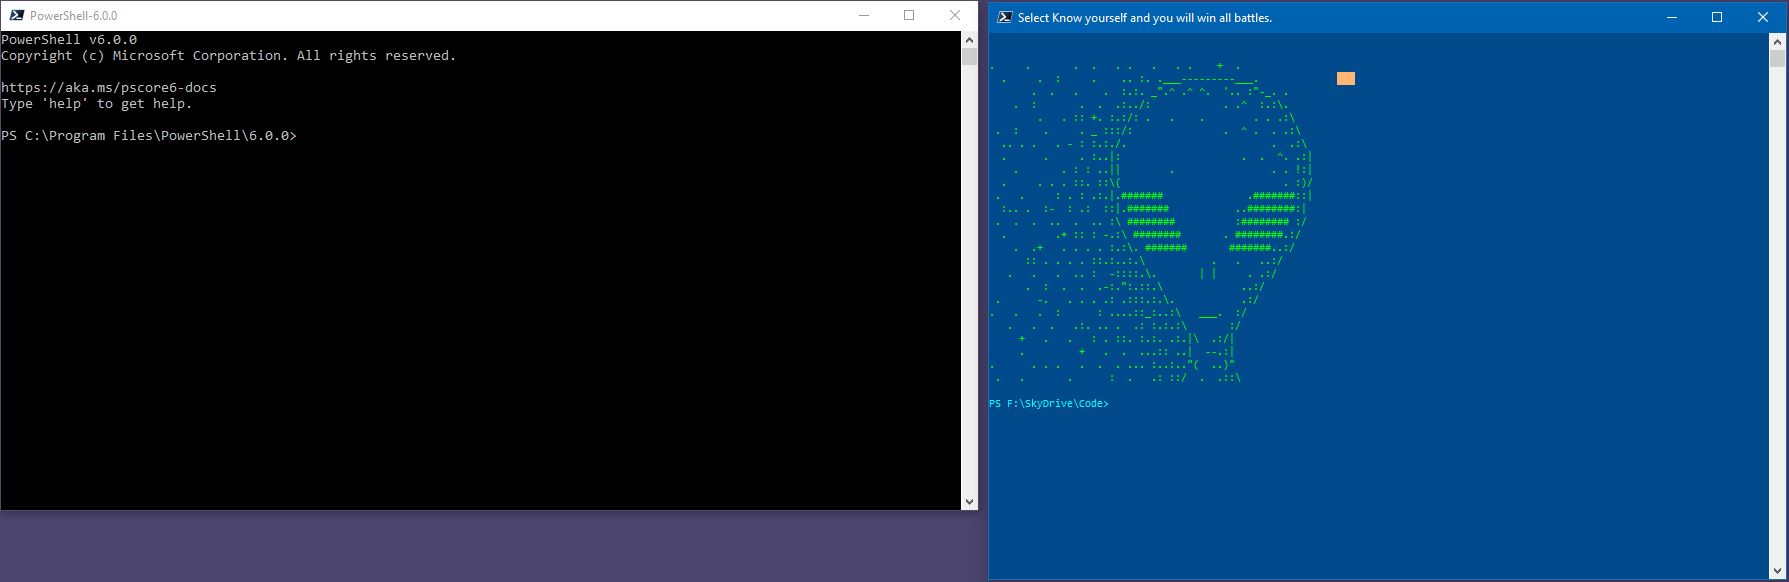
Original PowerShell Core console on the left with my modified profile.ps1 profile on the right.
Tip 2. Modify VS Code to use PowerShell Core Integrated Terminal
While I still do like to use the Windows PowerShell ISE with ISE Steroids from time to time. I’ve for the most part switched to VS Code for most of my day to day use. If you haven’t yet made the switch I highly recommend downloading it and giving it try. It’s fast, stable, and uses relatively little memory compared to the PowerShell ISE.
Currently as of VS Code 1.22 you can’t run multiple different Integrated Terminals. But there’s still a few things we can do here. We can change our default Integrated Terminal to PowerShell Core.
Open VS Code and navigate to File / Settings. On the left you have your Default Settings and on the Right you have your User Settings to overwrite the Default Settings.
Enter in the following between the two { }
// PowerShell Core
“terminal.integrated.shell.windows”: “C:\\Program Files\\PowerShell\\6.0.0\\pwsh.exe”,
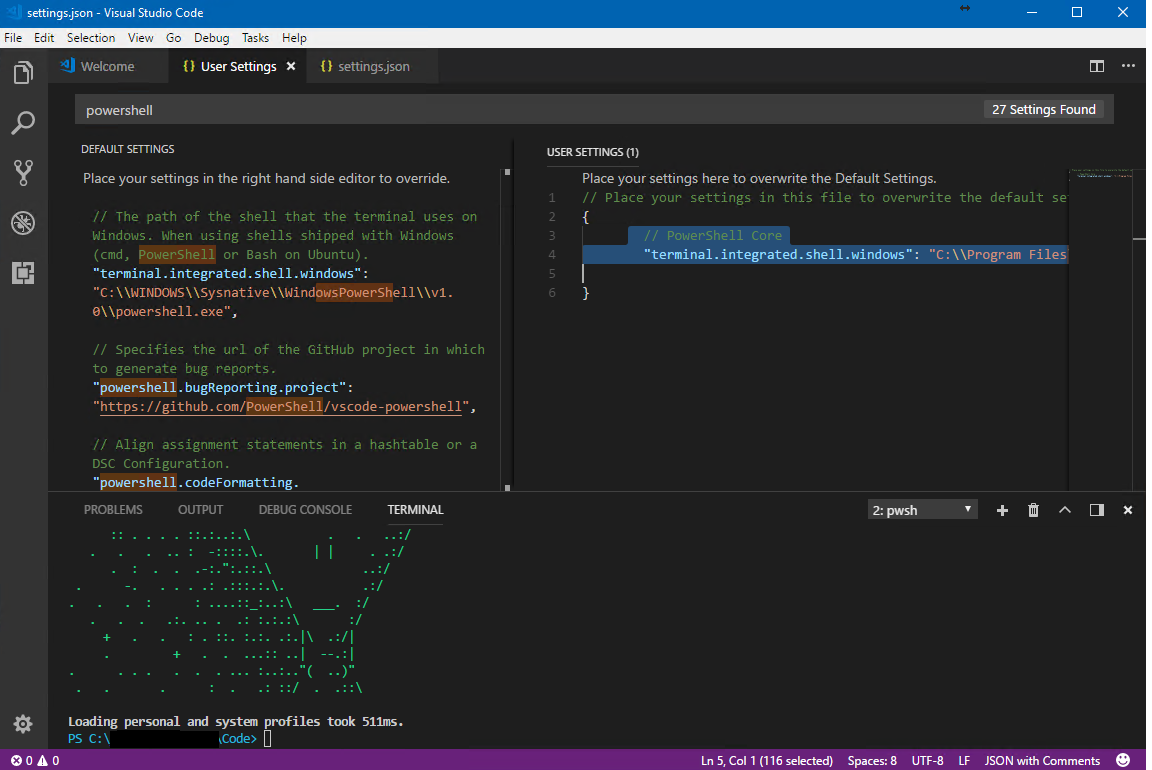
Now when you open up an Integrated Terminal it should default to PowerShell Core (pwsh.exe)
You can download VS Code from https://code.visualstudio.com/
Tip 3. Modify Console Window properties
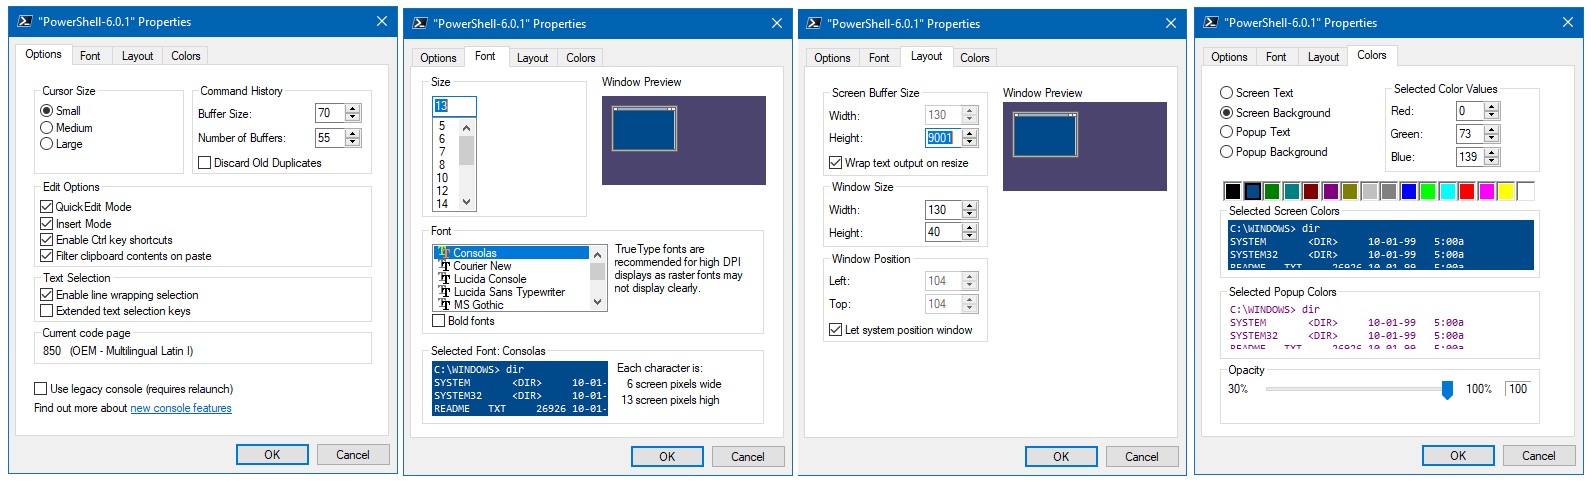
This one kind of carries on from Tip 1. More visual customisations on how a terminal session looks and is very much personal preference. Right click on the top left and pull up the terminal properties. I drop the Font size down to a non standard size of 13 which fixes what I feel is an overly elongated terminal. Increase the Layout windows size to 130 x 40 and hard code a different background colour. Finally I increase the Command History buffer size.
Tip 4. Use Chocolatey to Install and Upgrade PowerShell Core.
Chocolatey is a Windows Package Manager similar to apt-get or yum in the Linux world. What I love about Chocolatey is that it handles installing and configuring all dependencies you require when installing an application.
Installing Chocolatey is as simple as running a few commands on one line in PowerShell. Installing / Upgrading Powershell Core is just has simple once Chocolatey is installed.
The below command will install Chocolatey from a Powershell prompt.
Set-ExecutionPolicy Bypass -Scope Process -Force; iex ((New-Object System.Net.WebClient).DownloadString(‘https://chocolatey.org/install.ps1’))
This next command will install PowerShell Core and any dependencies it needs. Replace install with upgrade if you have a previous version of PowerShell Core installed.
choco install powershell-core -y
You can download Chocolatey from their website at https://chocolatey.org/ and instructions to install PowerShell Core can be found at https://chocolatey.org/packages/powershell-core
Tip 5. Find some modules
PowerShell Core by default uses a different module path to load modules. Meaning that all your Windows PowerShell modules won’t just import and run. This doesn’t mean that they won’t work. PowerShell Core has been designed to be has backwards compatible as possible. While modules like Active Directory won’t work correctly many still do.
By installing the WindowsPSModulePath module from the PowerShell Gallery, you can use Windows PowerShell modules by appending the Windows PowerShell PSModulePath to your PowerShell Core PSModulePath.
First, install the WindowsPSModulePath module from the PowerShell Gallery
Install-Module WindowsPSModulePath -Force
Then run the Add-WindowsPSModulePath cmdlet to add the Windows PowerShell PSModulePath to PowerShell Core:
Add-WindowsPSModulePath
This will now allow you to now start using all your current Windows PowerShell modules in Core (in your current session). This is not a guarantee that they will work though. So test thoroughly.
If you’re after specifically supported PowerShell Core modules you can search for the tag PSEdition_Core in the PowerShell Gallery.
I hope some of the above quick tips help you get started with PowerShell Core and make the transition a little easier.
Powershell core is located at `C:\Program Files\PowerShell\6\pwsh.exe` for me.