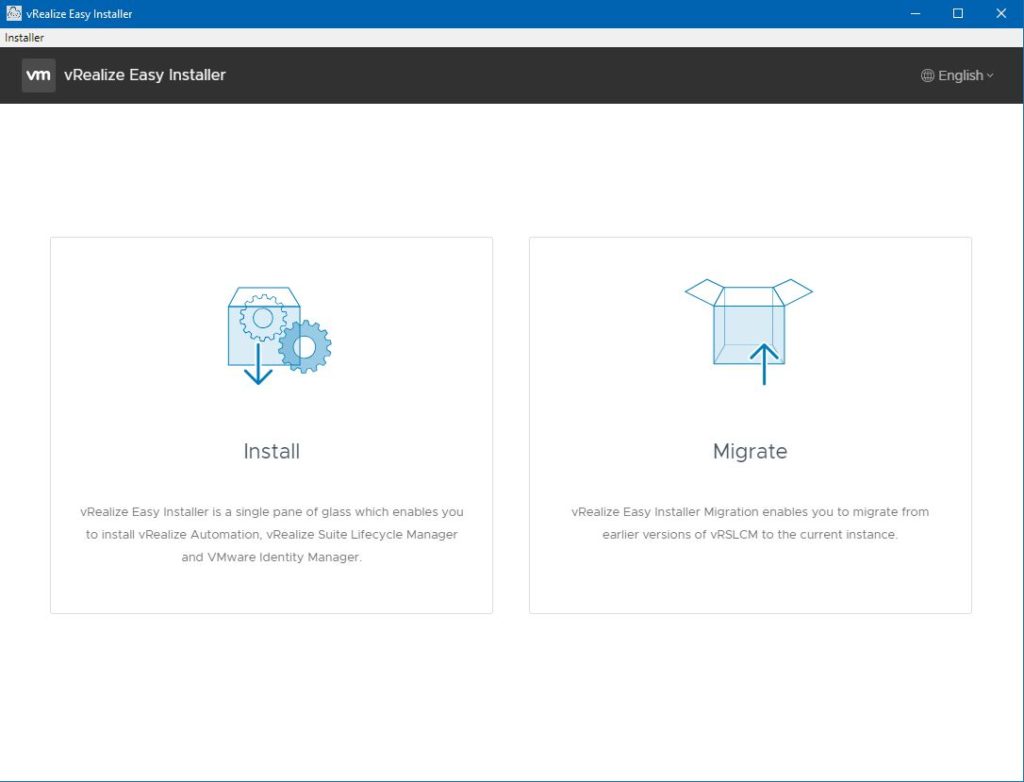
With the recent release of VMware vRealize Suite Lifecycle Manager 8.0 and vRealize Automation, also comes a new deployment tool called vRealize Easy Installer. The Easy Installer is a tool that streamlines and helps you install vRealize Suite Lifecycle Manager, VMware Identity Manager, and optionally, vRealize Automation via a simple and clean UI.
The three packages are contained within a single ISO file call VMware vRealize Suite Lifecycle Manager 8.0.0 Easy Installer. The ISO can be found within the vRealize Suite Download page in the My VMware portal. Selecting either vRealize Suite Lifecycle Manager or vRealize Automation will take you to the same 9GB ISO download. vIDM still has it’s own individual download if you want/need it.
The Easy Installer is compatible with Linux, Windows, and Mac, which should make it very accessible to a large audience. I decided to give it a try out and detail the process below. It’s a rather simple process to follow as long as a few prerequisites specific to the Installer are met first.
On the Memory front, LCM and vIDM both require 2 vCPUs and 6 GB of memory. vRealize Automation on the other hand will require, for a Standard install, 8 vCPUs and 32 GB Memory. You can times that by three for a Clustered install. If you enable Thin Disk provisioning, 75 GB min storage will be required. Finally DNS records for LCM, vIDM, and optionally vRA if being installed, need to be created first.
In the below process I use Windows 10 as the client source I install from.
To access the installer we need to right click the ISO file and select mount. This will mount the ISO as a drive in Windows. We can then navigate to \vrlcm-ui-installer\win32 (If you were on Linux or Mac this path would be different). Then select installer.exe to start the Installer UI.
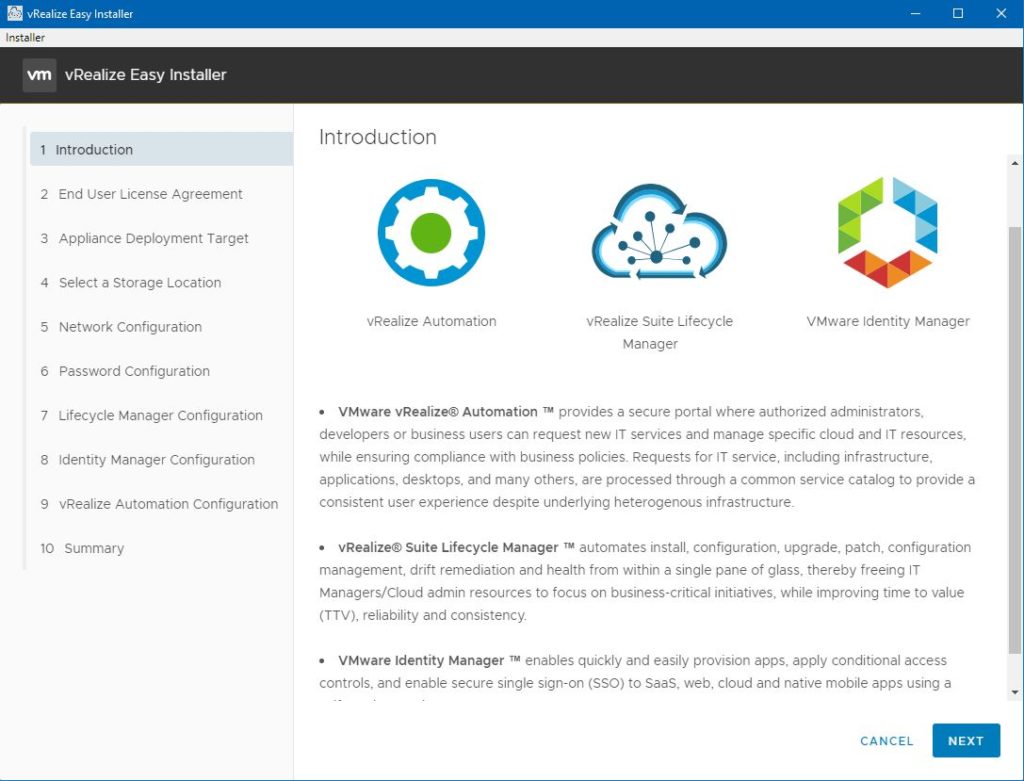
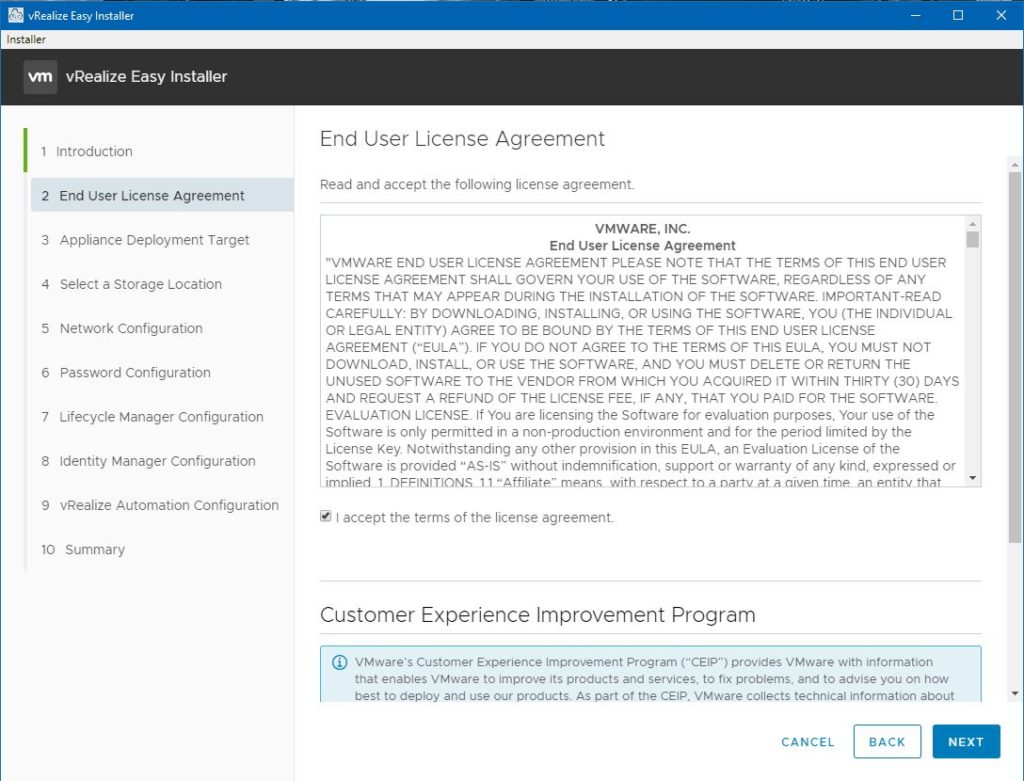
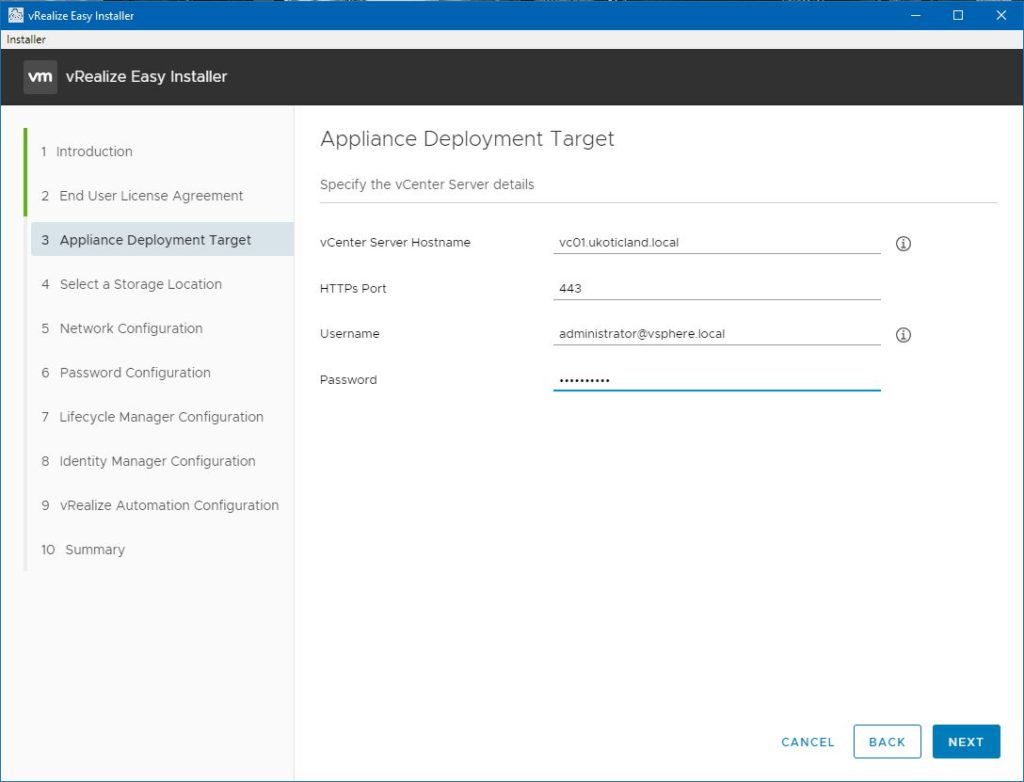
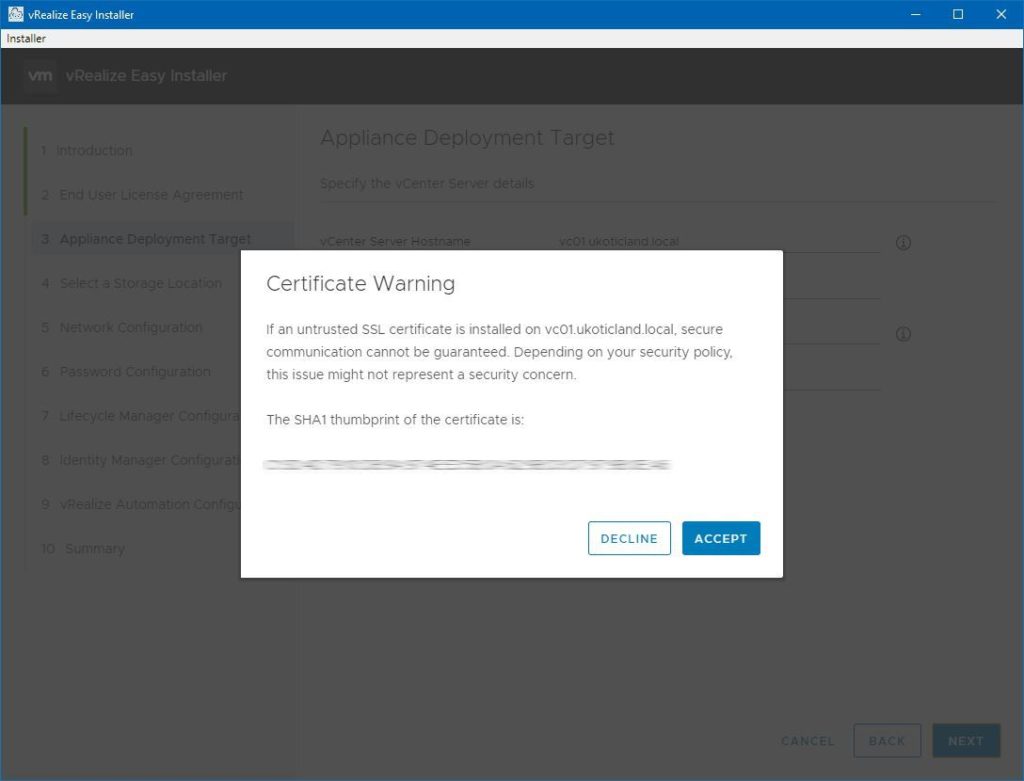
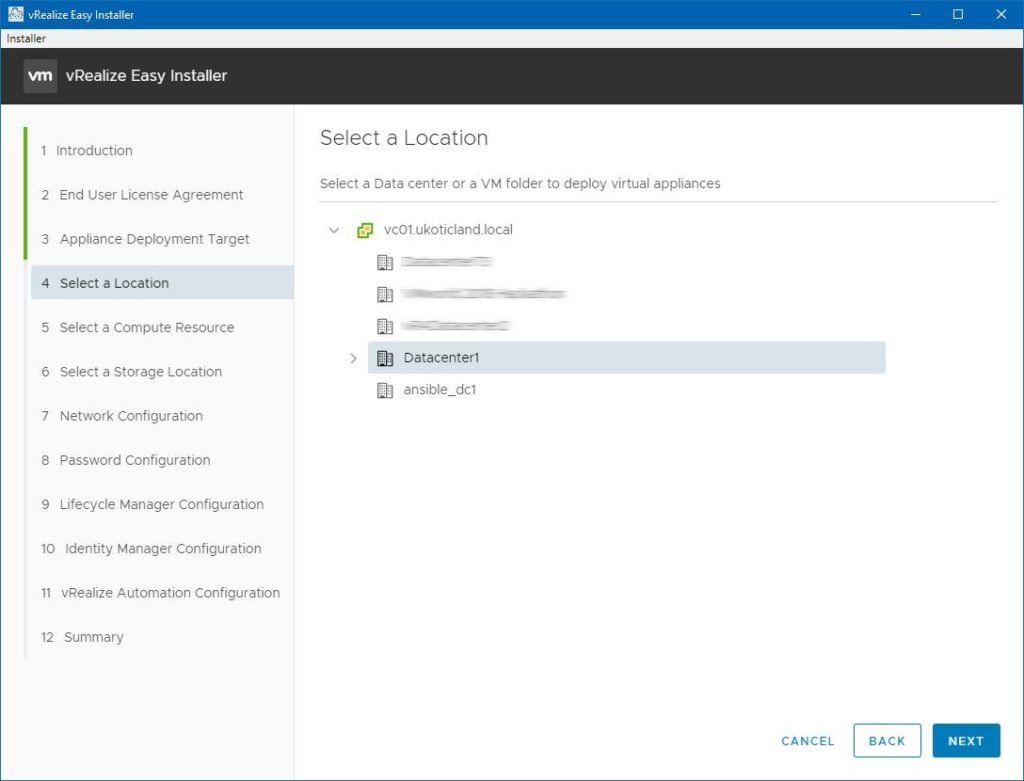
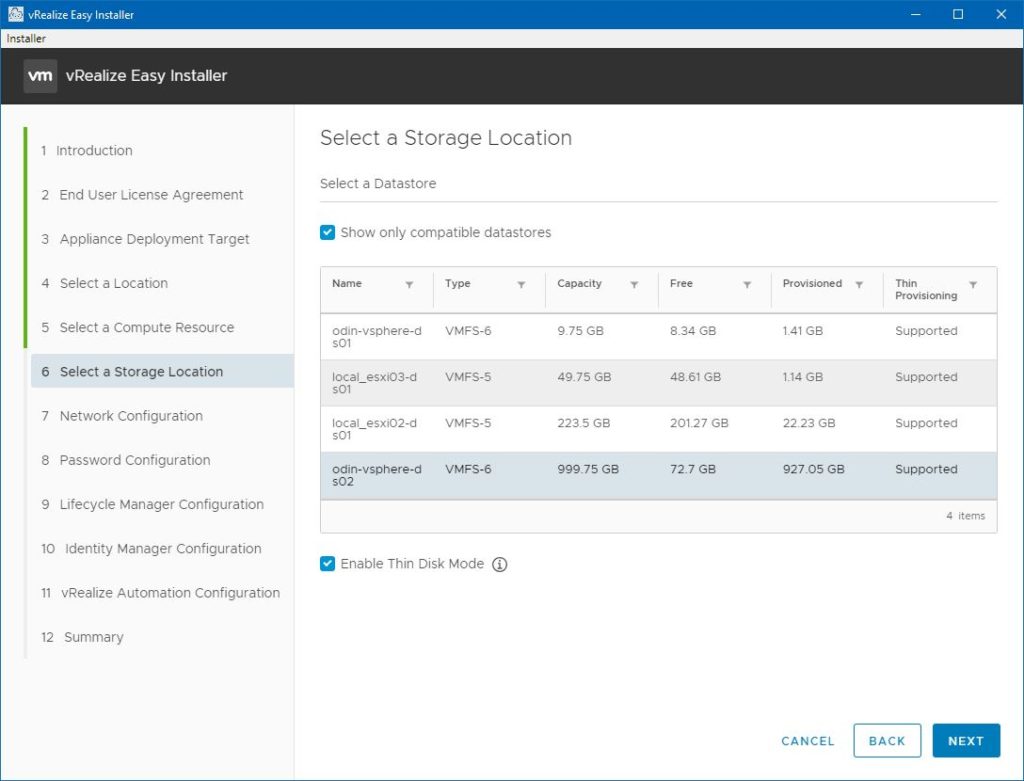
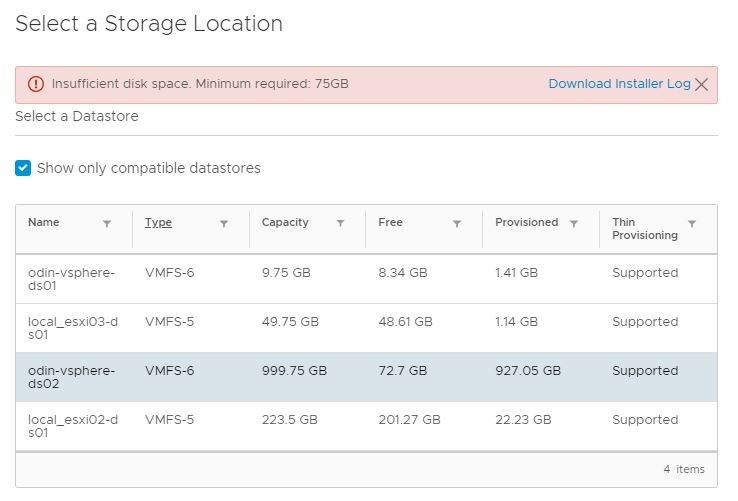
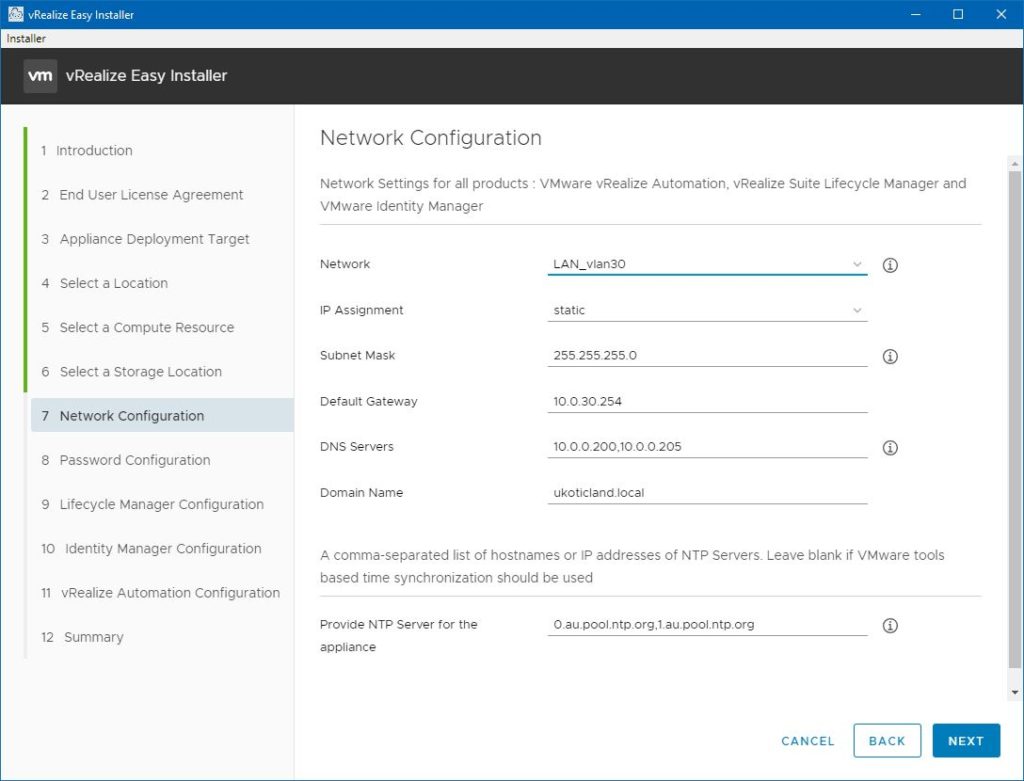
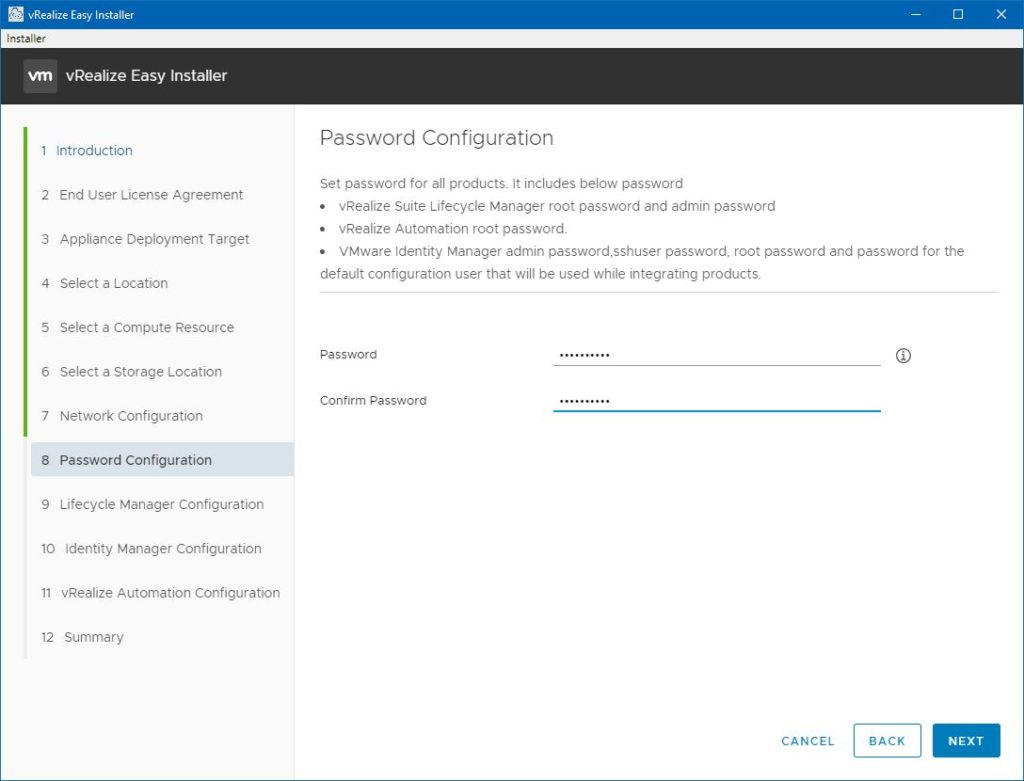
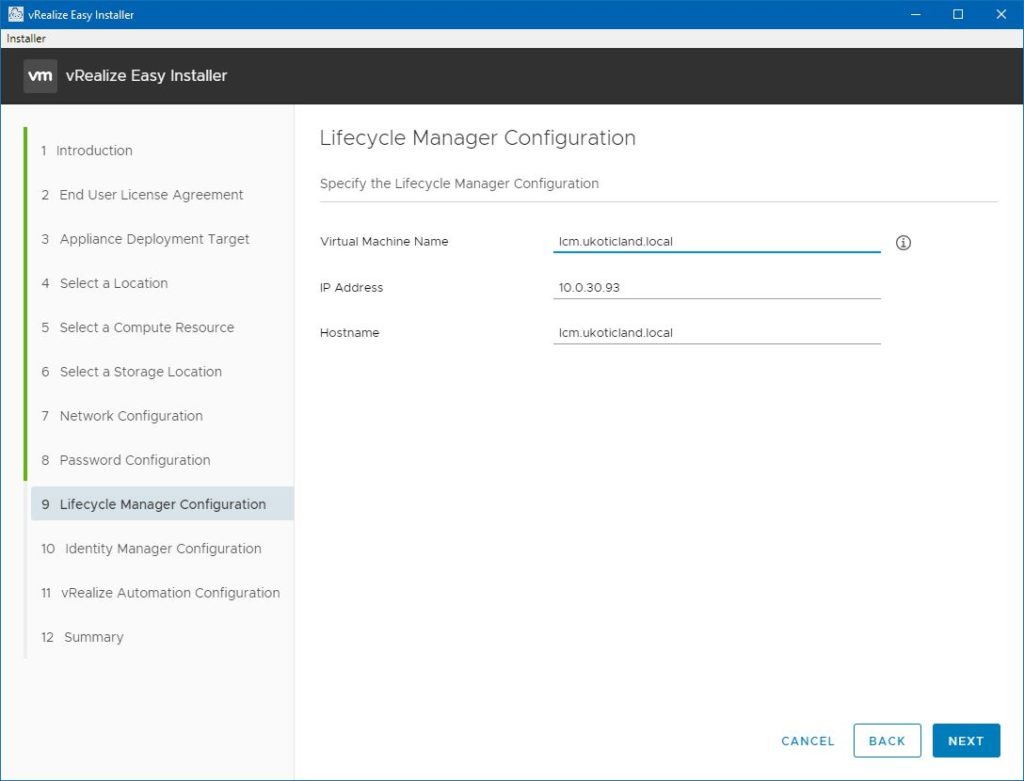
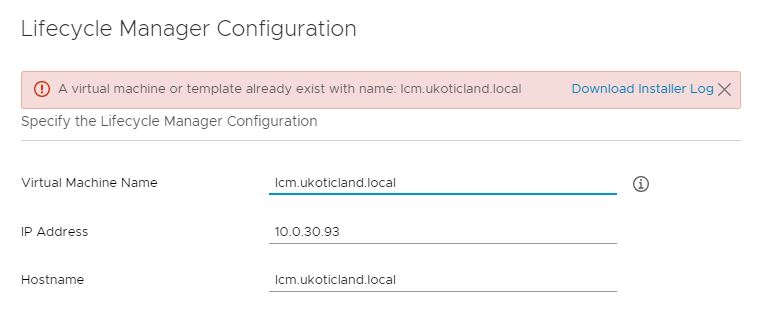
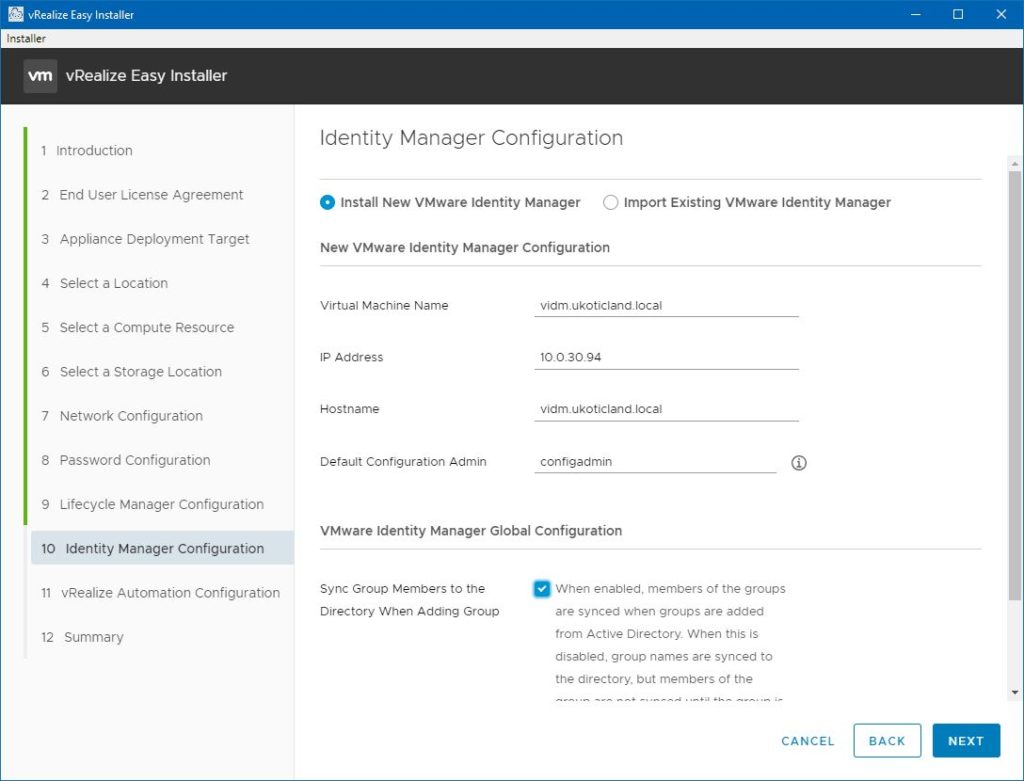
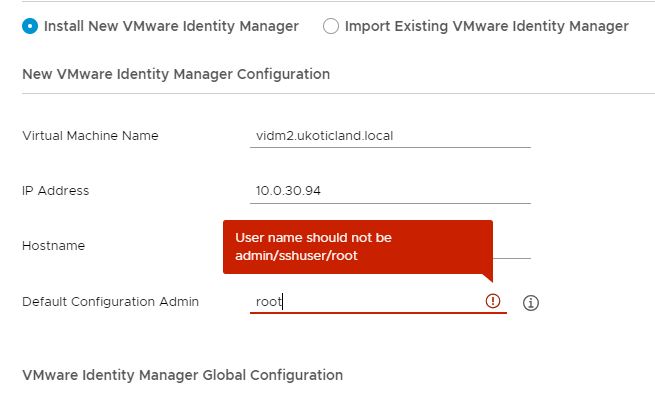
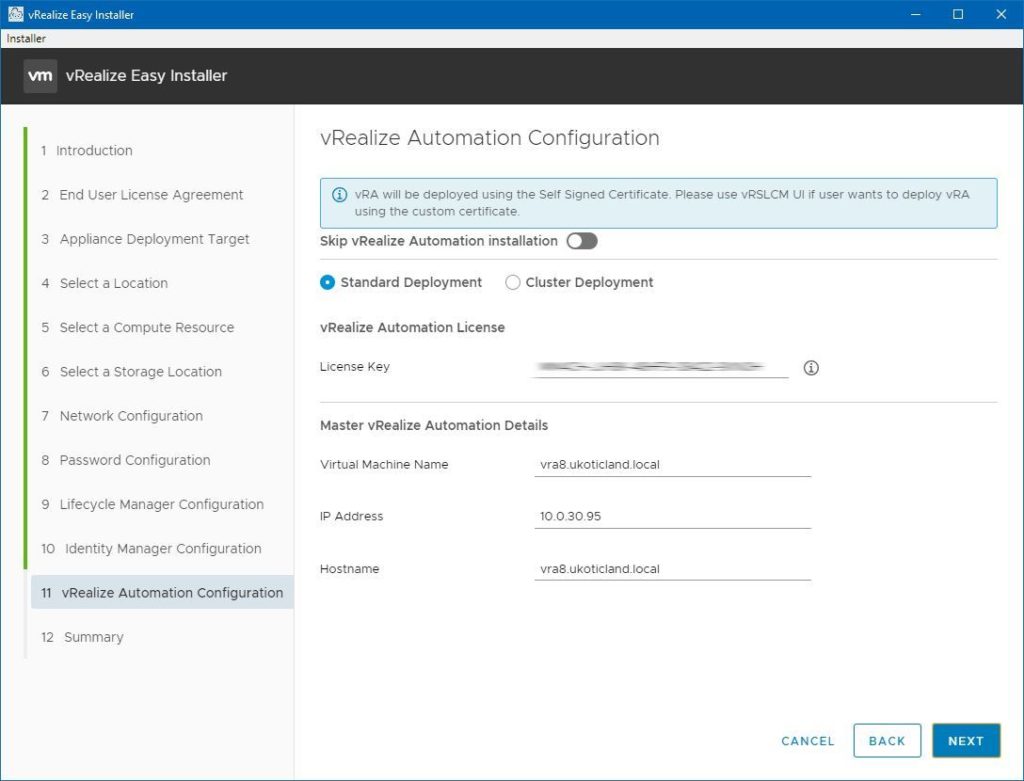
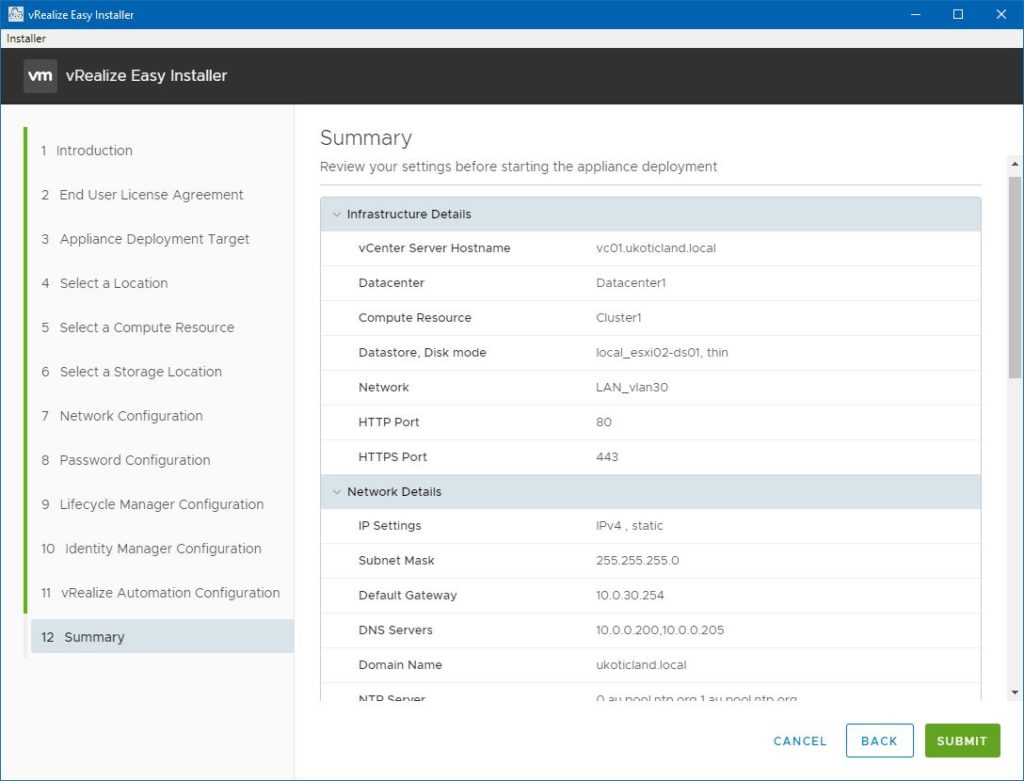
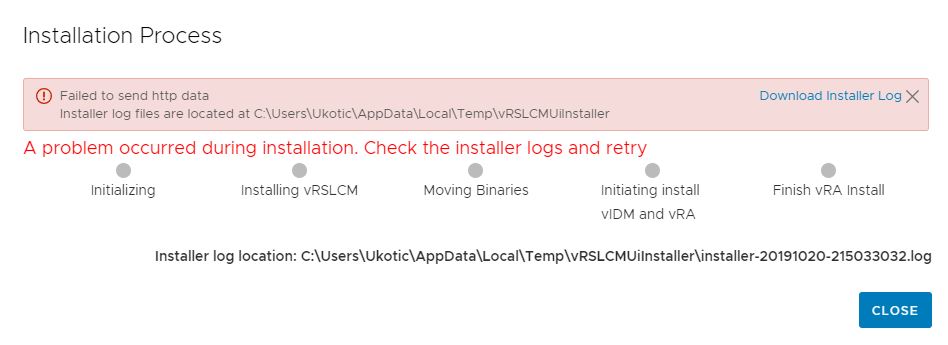
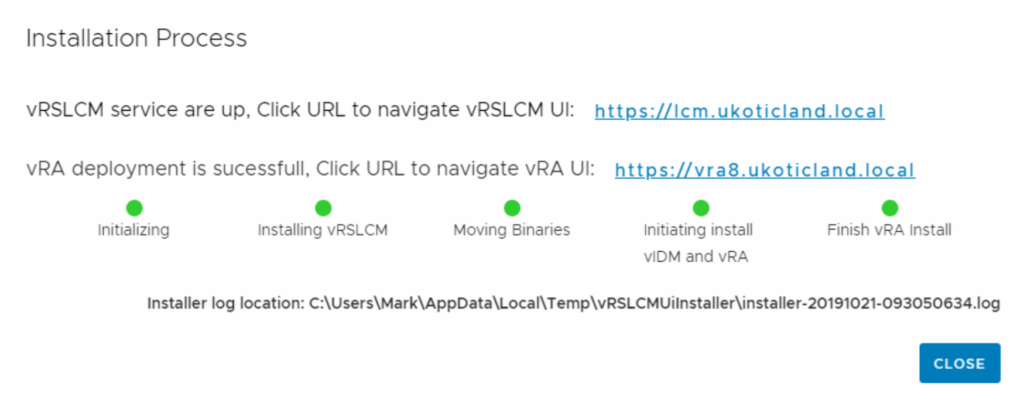
Step 1. Select InstallStep 2. Introduction -- Click NextStep 3. EULA -- Accept terms and CEIP then click NextStep 4. Appliance Deployment Target -- Enter in vCenter details and click Next Step 5. Certificate Validation — Accept any warnings and click Next Step 6. Select a Location -- Select a Datacenter and click NextStep 7. Select a Compute Resource -- Select a Cluster and click NextStep 8. Select a Storage Location -- Select a Datastore and optionally Enable Thin Disk Mode and click NextA warning will display if you click Next and there is insufficient disk space. You will need a minimum of 75 GB for a Thin Disk installStep 9. Network Configuration -- Enter in global networking details for the install of all products. Optionally enter in NTP settings. Only static IP assignment is possible.Step 10. Password Configuration -- Enter in a default root/admin password to be assigned to all productsStep 11. Lifecycle Manager Configuration -- Enter in LCM details and click NextIf a VM with the same name is found in vCenter when you click Next you will receive a warningStep 12. Identity Manager Configuration -- Enter in the vIDM details. Optionally enable the Sync Group Member to the DirectoryDo not use admin/sshuser/root when selecting a Default Configuration Admin account name.Step 13. vRealize Automation Configuration -- Choose to install vRA 8. Standard Deployment will deploy one vRA 8 server. Cluster Deployment will deploy three. The License Key will not be validated at this stage so confirm it is correct.Step 14. Summary -- Verify all installation parameters and click SubmitIf there are any issues during installation the install will fail and you will have the option to download the logs to troubleshoot the issue. Make sure all your DNS settings are correct and the client you are installing from can validate those DNS settings.A successful install will look similar to this