With the release of vRealize Automation 8.2 you now have the ability to integrate Terraform into Cloud Assembly. This allows you to create cloud templates and use Terraform as a resource type on the canvas and in your YAML code. You can then turn those cloud templates leveraging Terraform into catalog items in Service Broker for users to request.
As with a lot of things vRA, it’s never that simple though. A few prerequisite are needed to start using Terraform in vRA. Firstly a Kubernetes cluster is required. The purpose of Kubernetes is for vRA to spin up a POD and run a Terraform container image. It’s in this container that your Terraform configuration is executed from. You’ll also need a Cloud Zone setup in vRA. Pretty stock standard, nothing special here, it could be AWS, Azure, or in my example below vSphere. And finally source control integration to store your Terraform configuration files.
Building a Kubernetes cluster is just a tad outside the scope of this blog post. But If you have access to a Kubernetes cluster, either TKG or a standard self managed one, you’re in good shape to get Terraform integration up and going relatively fast. In the below steps I use a self managed K8s cluster I have created in my homelab.
So once you meet these prerequisites you want to head to Infrastructure > Connections > Integrations within Cloud Assembly. Click on Add Integration and select Terraform Runtime. One thing to note is you can have only one Terraform Integration in Cloud Assembly.
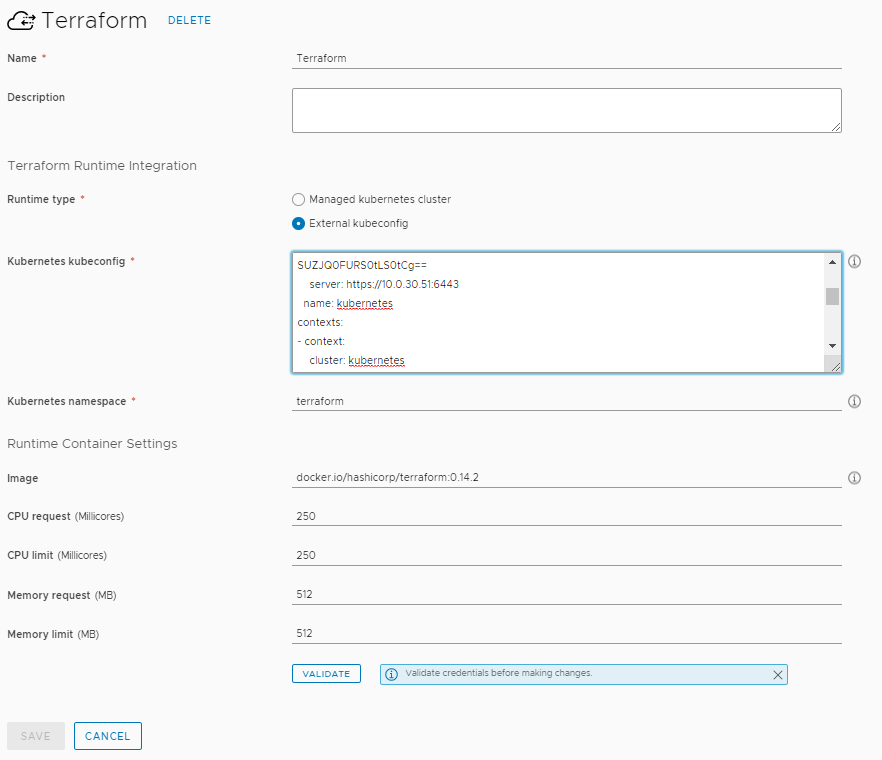
We need to define a few pieces of information here. Obviously a name for the integration, Terraform for simplicities sake. Next is the K8s Runtime type. Managed is a Kubernetes cluster you have already configured under Resources > Kubernetes. The other is External kubeconfig which is a standard K8s cluster you basically haven’t already integrated into vRA8. In the below example I use External and I paste the entirety of my kubeconfig file that resides on my three-node Kubernetes cluster I built on Ubuntu. You also need a namespace where the Terraform POD will be spun up in. You could use default but I quickly created a new namespace in my K8s cluster with the command kubectl create namespace terraform. Lastly you need to specify a container image that will be used during deployments. By default the image will be from the Docker Registry. I’ve updated the container image to use version 0.14.2 from Docker Hub but you could also use the tag latest. Then click Validate and if successful Save.
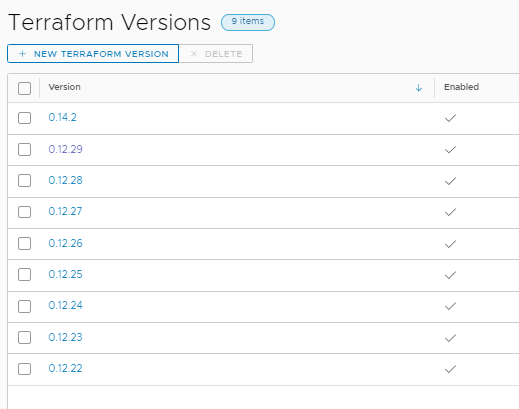
Next, and this is optional, head to Infrastructure > Configuration > Terraform Versions. vRA comes with a number of preconfigured Terraform versions available to be used. As Hashicorp release new versions you may want to add them in here. You can leverage different Terraform CLI versions in your cloud templates as you test and validate newer versions.
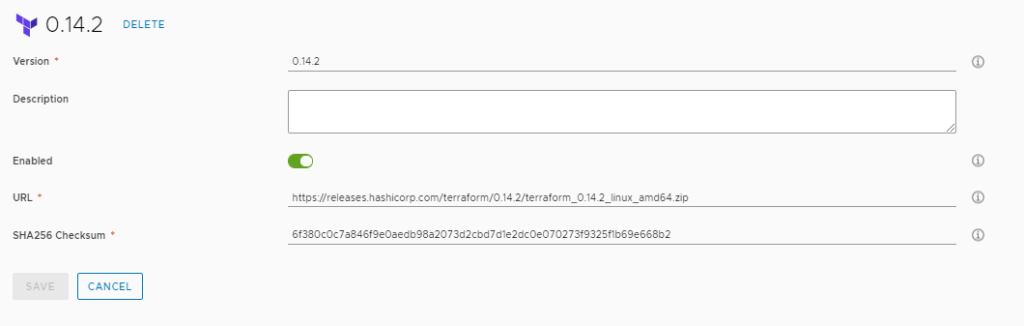
Click on New Terraform Version. Give it a version name. In my case 0.14.2. Click Enable so it can be selected and used in Cloud Templates. Paste in the URL where the Terraform zip file can be download from and installed into the POD that is spun up during a deployment. You can find this on the Hashicorp Terraform download site. You also need the SHA256 checksum of the zip file. Without this the download in the POD will fail. You can find a link to the checksums from the same Hashicorp link above. Then copy and paste the checksum out of the zip for the version you are using.
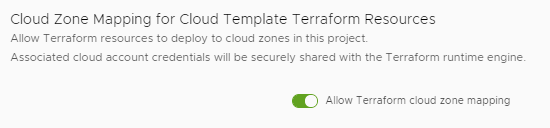
The last bit of the configuration is we need to Allow Terraform cloud zone mapping in our Project. We do this by going to Infrastructure > Administration > Projects and selecting the Project we intend on using. Click on the Project and scroll to the bottom. Select the Slider to enable.
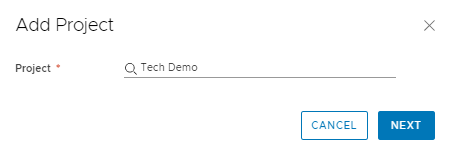
That’s the bulk of the Terraform configuration in vRA but we still have a few things left to do. Remember I mentioned you need your Terraform configuration in source control. That could be GitHub, GitLab, or BitBucket, they’re all valid sources in vRA 8.2+. As with Kubernetes this post would be way to long if I went through the configuration process of Git Integration. So I’ll assume you already have it configured (sorry). Go to your configured Git integration in Infrastructure > Connections > Integrations. Click on Add Project and make sure to select the same project that you enabled the Terraform mapping to.
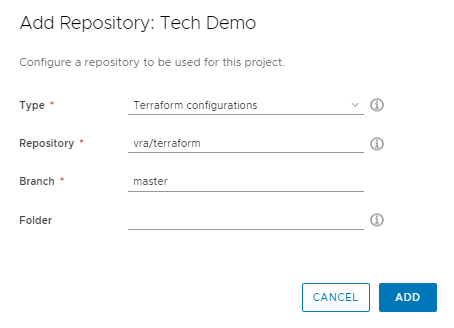
Next we define our Git Repository. This is the location where our Terraform configurations reside. There is a format that it must have. You’re Terraform configurations should reside in a directory within this repository. Each Terraform configuration you have should reside in a different directory. For Type select Terraform configuration. Next define your Repository location. This will be slightly different depending on your type of source control integration. I’m using GitLab in my homelab with the user vra and a repository of terraform. I’m also using the master branch. You can ignore the Folder at this stage as it can be selected later on. Here is a basic terraform configuration I’m using in this demo as an example on GitHub.
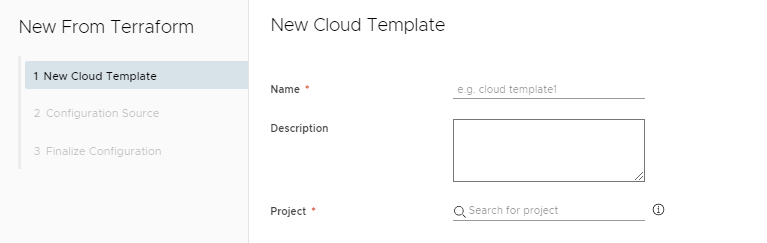
We are now at the point we can create our cloud template and use a Terraform resource. Head over to Design > Cloud Templates. Select New From and select Terraform. This is the easiest way to get started which will open up a wizard to help configure your first Terraform Cloud Template. Specify a Name for the new template and the Project, the same project we used above in the configuration.
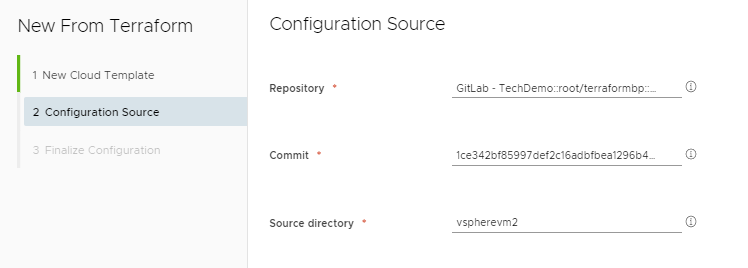
Next we specify our Repository we defined for our Terraform configurations. We select a Commit version. You do this by scrolling through the commit messages till you find the one you want and when selected a commit ID is shown. Finally you select the Source Directory. This is the directory within your repo that has your Terraform configuration.
On the Finalize Configuration window you select your Terraform version, 0.14.2 in my case. Here you can see the Provider you’re using in your Terraform code and any variables you have defined in the Terraform TF file. In my case I’m using the vSphere provider in my Terraform configuration. You don’t need to specify a username or password with the provider. This is handled by the cloud zone in vRA.

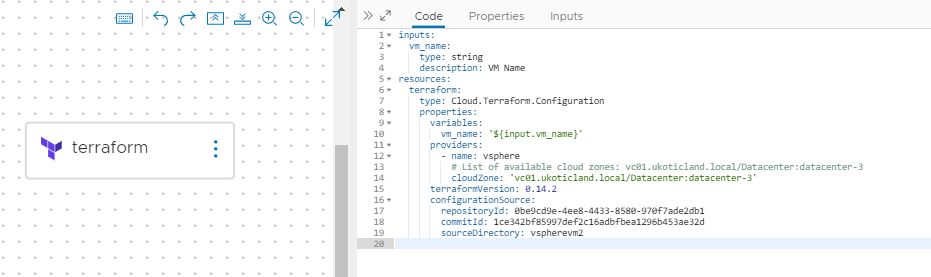
Once you run through the wizard you should see a Terraform resource on the Cloud Template canvas and code similar to the below. When you make changes to your source control you can just update the commit ID without having to run through the wizard again.
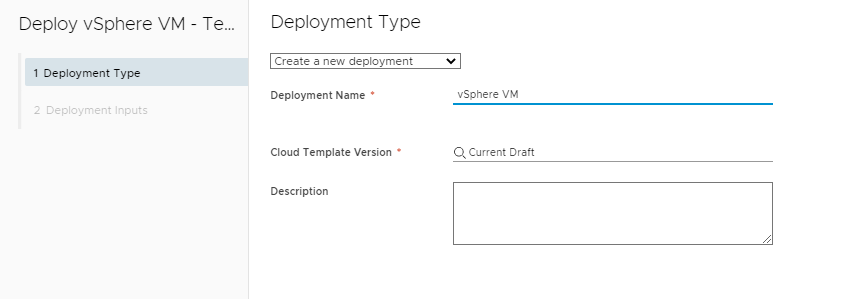
All things being equal, if your integrations have all been setup correctly, you should be able to perform a deploy with the cloud template you just created.
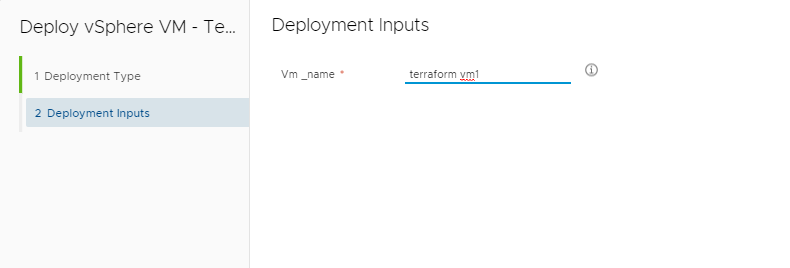
If you have any inputs you can put them in.
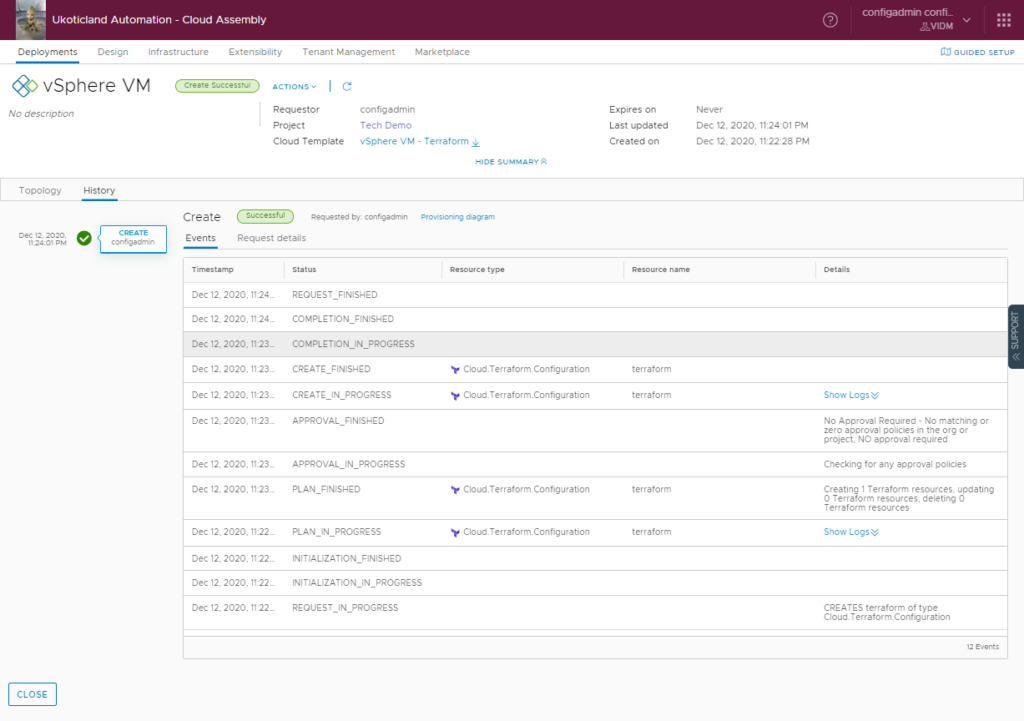
A successful deployment will look similar to below.
After vRA performs a Terraform deployment you have the ability, as with other deployment types, to delete the deployment. This will trigger another terraform deployment in Kubernetes which will destroy the resources that were created.
While some people, or should I say maybe a lot of people, will find the need to have a Kubernetes environment a little inconvenient to use Terraform integration in vRA. If you do have an available Kubernetes cluster, vRA is a nice way to start consuming Terraform configurations. Being able to allow users via RBAC to consume Terraform catalog items via the service broker and easily input variables is quite cool. Think allowing end users to spin up a development environment in the cloud via Terraform and then control lease expiration via vRA policies.