At VMworld 2021, VMware announced their open source, community version, of VMware Tanzu called Tanzu Community Edition (TCE). This is a freely available version with no costs and no usage limitations. It’s the same open source software used in the commercial editions of Tanzu.
VMware has a site that explains what TCE is all about, how to install it in various environments, and how to use it. In this guide I’m going to explain how I specifically installed TCE on vSphere and got my first management cluster up and running. For my management cluster I kept things very simple. I chose not to install the NSX-T Advanced Load Balancer (AVI) or do any integrations with OIDC/LDAP or TMC.
This guide is just focused on getting the first management cluster up and running as fast as possible so you can start learning and using Tanzu. Following this you would still need to look at then deploying workload clusters (a guide for another day). Without a load balancer we’re also limited at this stage what we can do with external access for pods and containers, but there are work arounds (again, guides for another day).
It’s worth noting that there is also a standalone cluster that can be deployed, rather than a management cluster. This is still highly experimental and not something I’m currently across.
Prepping vCenter
Before you can start the installation of TCE there are a number of steps you need to perform first. The most important is you need a bootstrap client. An OS configured with all the tools and components you will need to start and run the installation of TCE. This guide will not focus on that. Refer to the TCE site on how to achieve this if you haven’t already done so.
In this guide we are installing TCE on vSphere. So there are a few pieces of specific configuration we need to perform in vCenter. This is not to complicated so I’ll briefly cover them below. This is specific to my situation and what I did but I expect it to translate similar to what you would need to do as well.
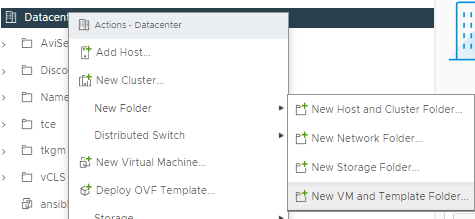
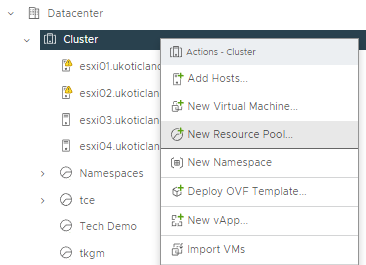
The first two things I did was create a new VM and Template Folder under my datacenter called tce. As well as create a new Resource Pool called tce under this same datacenter. We will reference these during the installation later on.
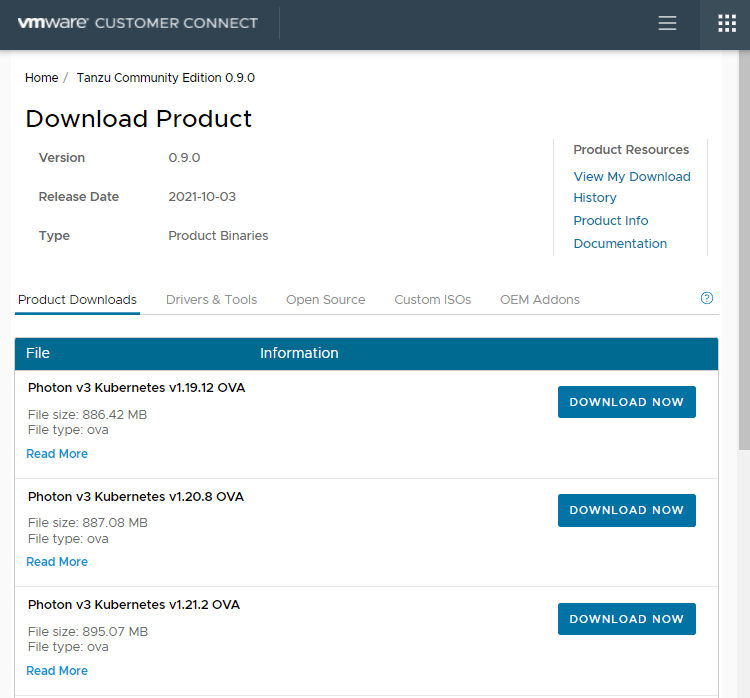
Next I downloaded the latest supported version of Kubernetes for TCE. You will need an account on VMware’s Customer Connect site for this part. The TCE site doesn’t do a real good job of explaining supported versions. In our case with TCE 0.9 we want Photon v3 Kubernetes v1.21.2 OVA.
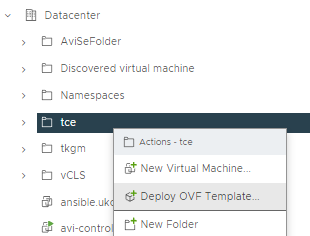
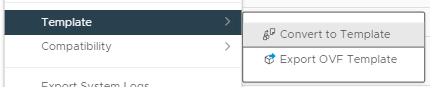
Once downloaded we need to deploy the OVA in vCenter and then convert it to a template. I do this by selecting the tce folder we created earlier and selecting Deploy OVF template. During the deployment leave the name of the VM the default. Then once deployed, right click on the VM and Convert to Template. We do this because during the configuration and installation of TCE we will reference this template for deployment proposes.
Finally we need a datastore and a network we want to install onto. Because we’re not using the Advanced Load Balancer in this guide we need our network to support DHCP. This is so we can hand out IPs to the nodes of our management cluster and future workload clusters.
With all that completed and assuming our bootstrapped client is correct we can now start the configuration and installation of TCE. In my guide I’m using a Windows bootstrap client.
Installation
From your bootstrap client. Open up a PowerShell CLI and type in the following command.
tanzu management-cluster create --ui

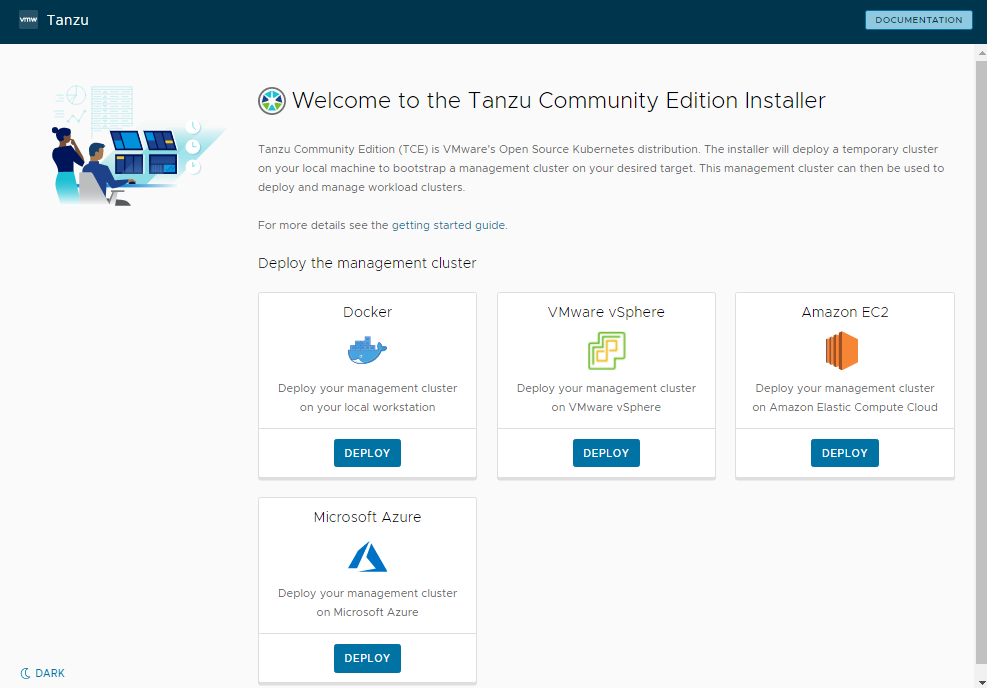
This will open up a browser tab with the Tanzu Community Edition (TCE) installer. You may need to click accept to allow Windows to open up a browser window. Here we have four options on where to install the management cluster. For this guide we’re going to click Deploy for VMware vSphere.
The configuration wizard will now start which we need to work our way through.
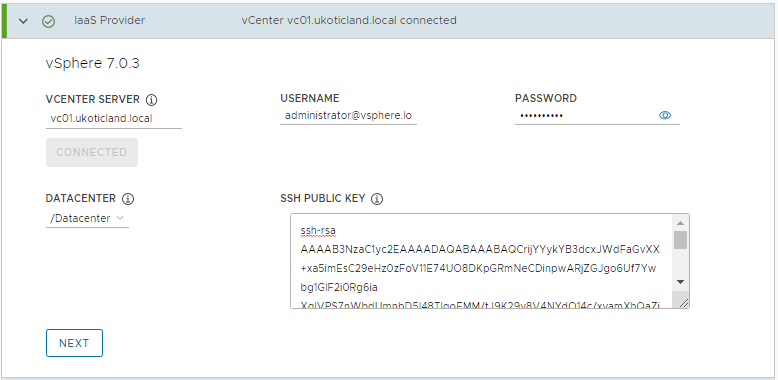
Step 1. Here we connect to our vCenter server. Enter your FQDN or IP address of your vCenter. Along with your username and password. For this guide I’m using the [email protected] account as it’s guaranteed to have the permissions required for successful deployment. When you click connect you can then select your datacenter from a dropdown list.
The last piece of information we need on this step is an SSH public key (not the private one). I used ssh-keygen on a linux box to generate my SSH keys and then pasted the information in the public key textbox below. You can use a Windows box to do this as well but find it more reliable on Linux.
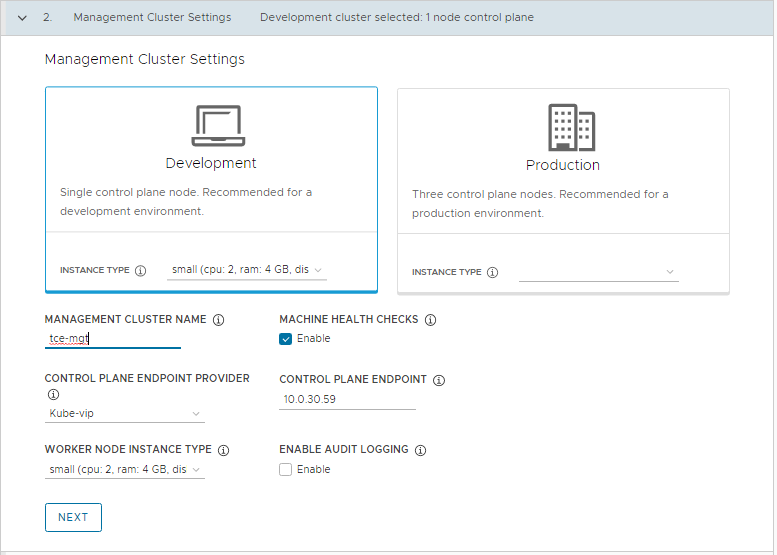
Step 2. This section involves us defining our management cluster settings. Here I’m selecting Development. This will deploy a single control plane node and one worker node on initial deployment. For the instance type, I’m going to select the small size. For Devel and testing this is perfectly fine.
Define a name for the management cluster. This will be used to form the first part of the full cluster name during a deployment. Leave Machine Health Checks selected. We’re not using any external load balancers so leave Control Plane endpoint provider on Kube-vip. For the control plane endpoint enter in an IP address on the same network that you want to deploy the TCE nodes on (we define this network later). This will be the VIP that we connect to our cluster on after deployment.
Finally select the size of the Worker Nodes, small again for me, and leave audit logging not enabled.
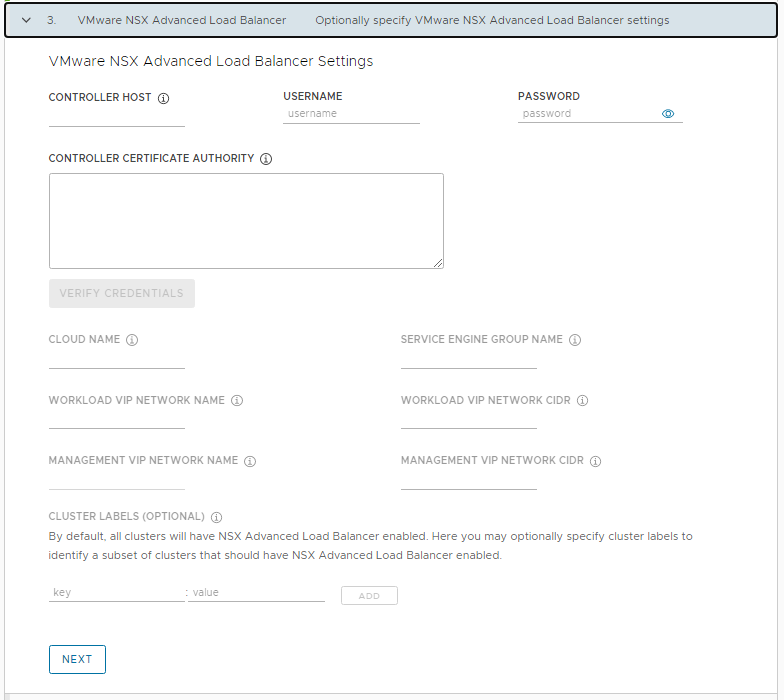
Step 3. This step is around configuring the NSX Advanced Load Balancer, or AVI as it’s also known as. We don’t actually need to configure this section and for this guide we’re not going to initially configure it. In fact configuring AVI / AKO post deployment gives you more flexibility on how it’s deployed. So just click Next.
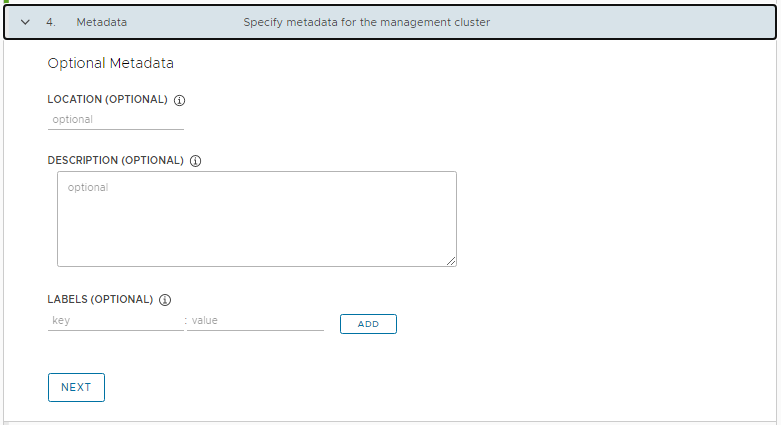
Step 4. We’re not going to define any Metadata so click next.
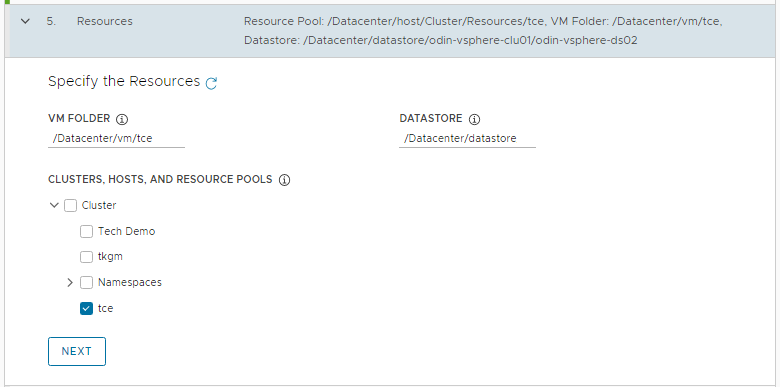
Step 5. Here we define a few placement settings. This is where we reference the work we performed earlier. We need to define all these settings. Select a VM folder where the VMs will reside in vCenter, I’m using the tce folder. Select a Cluster or a specific Resource Pool for the VMs, again I’m using the tce Resource Pool we created, and finally the datastore to deploy the VMs into.
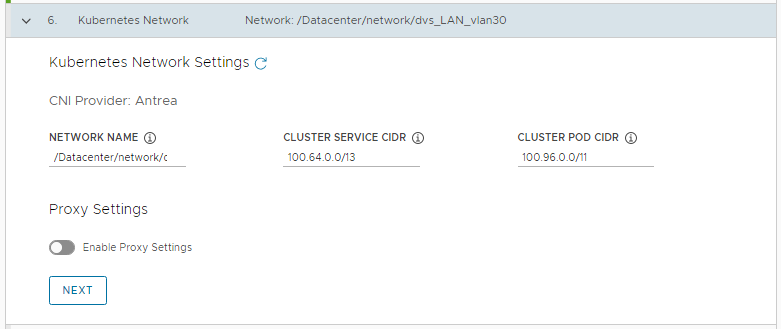
Step 6. This part involves configuring our network. For the Network Name select the network from the drop down where you want your TCE VMs to connect into. Make sure that Control Plane Endpoint you defined on step 2 lives on this same network. Also make sure that this network is running DHCP. For the Cluster Service CIDR and Cluster POD CIDR I left them as the defaults. You would only really need to consider changing this if your network is currently using these ranges.
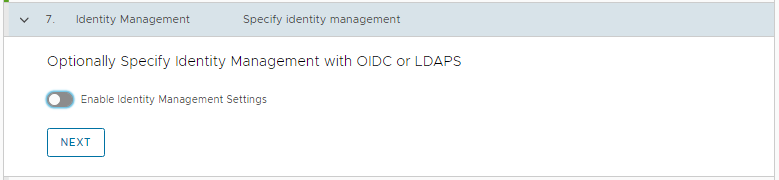
Step 7. We can disable using any Identity Management. This is where we could connect TCE clusters into things like Active Directory so we can sign in with our AD account but we’ll skip for now.
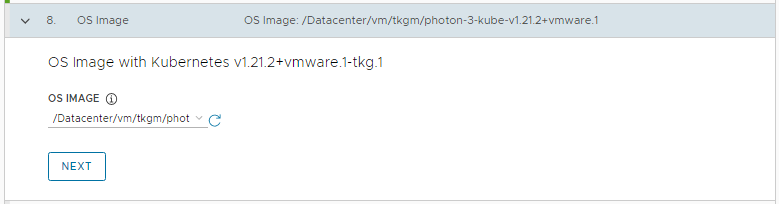
Step 8. Here we select the TKG image we uploaded earlier on. It should be the only one in the dropdown at this stage. The name should basically match the one it’s asking for.
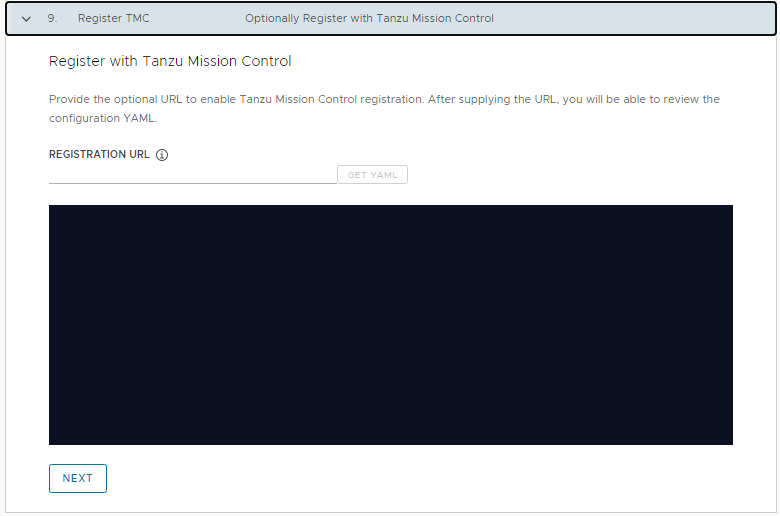
Step 9. We can skip setting up TMC and click next.
We’ve now finally reached the end of defining our configuration settings for a deployment. Click the Review Configuration
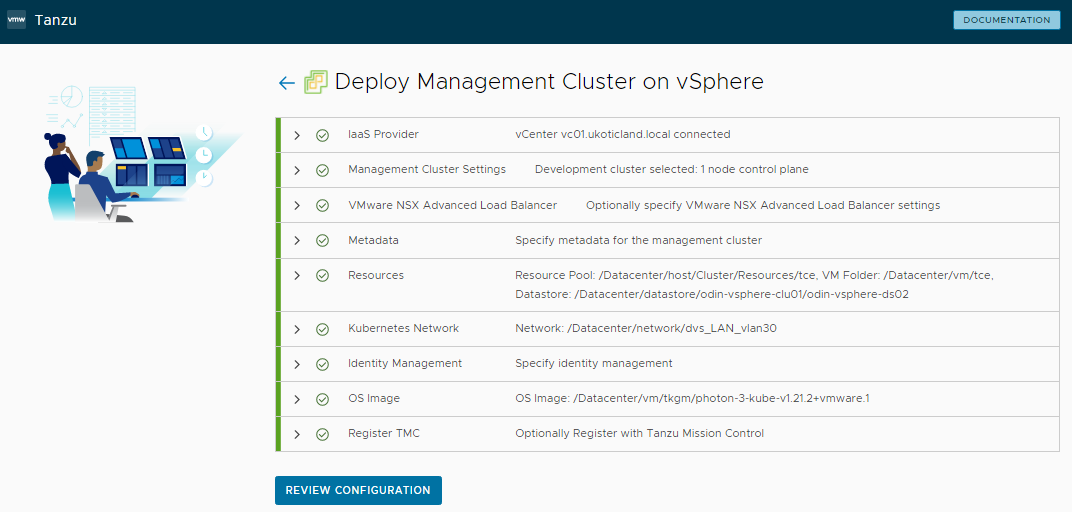
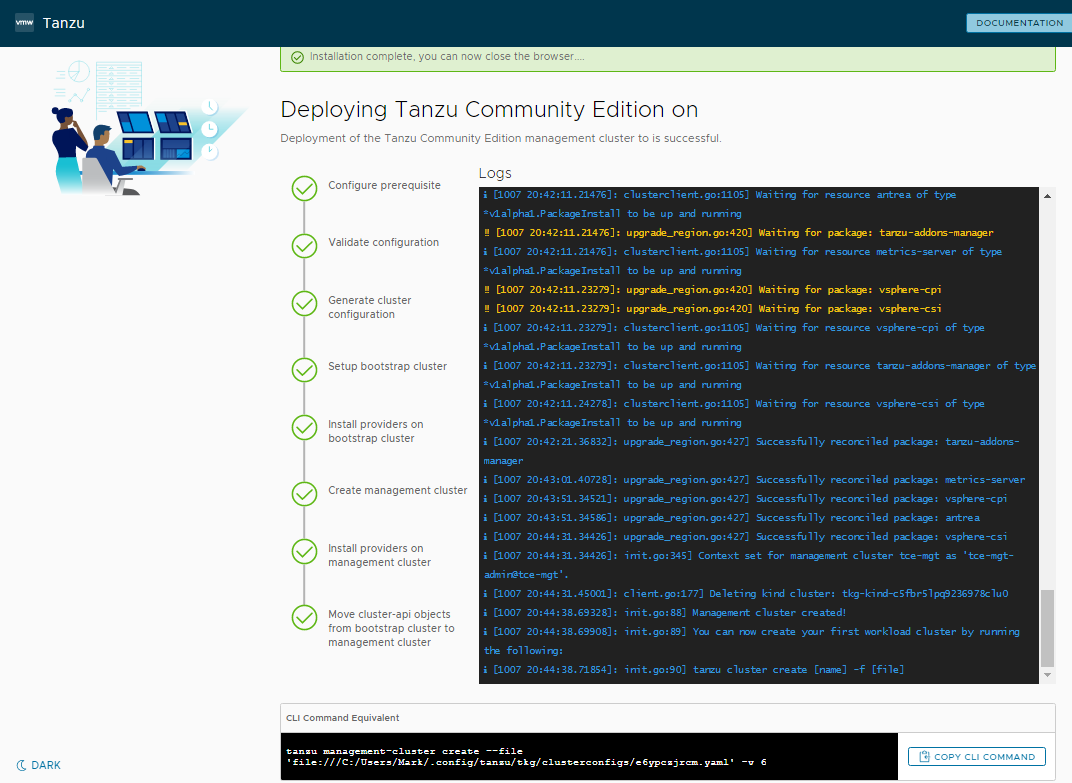
Review your settings and click Deploy Management Cluster

Fingers crossed, after a little bit of time, you should have a successful installation.
Validation
With the installation complete we can now connect to our cluster from the CLI. Type in tanzu login and select your management cluster.
tanzu login


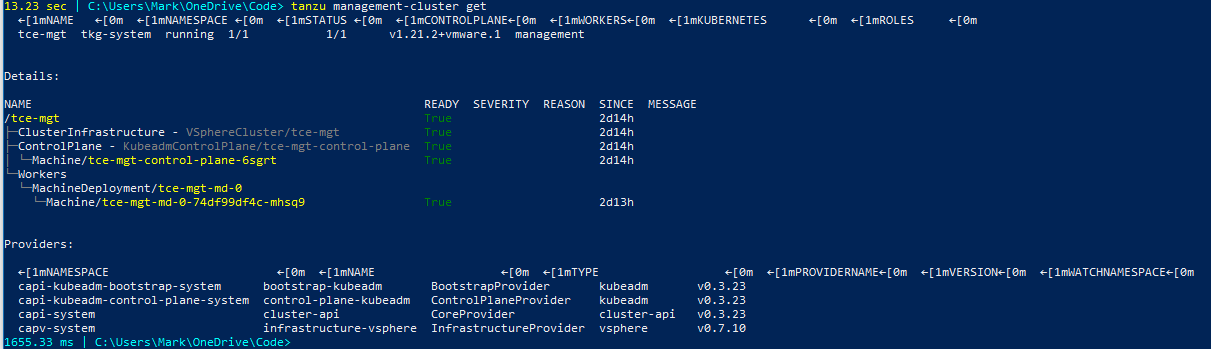
Typing in tanzu management-cluster get will list the details of our environment. If you’re running this on Windows and in PowerShell you may have some strange formatting issues with ascii characters. It should be safe to ignore.
tanzu management-cluster get
Next let’s get our kubeconfig details for this cluster so we can actually connect into our kubernetes cluster.
tanzu management-cluster kubeconfig get --admin
This will provide us a kubectl command to run based on our cluster name. In my case my cluster is called tce-mgt.
kubectl config use-context tce-mgt-admin@tce-mgt

Now that we’re authenticated into our kubernetes cluster we can start to run standard kubectl commands.
kubectl get nodes

Creating a Deployment and Service
Even though we don’t have a load balancer we can still deploy and testing pods on the management cluster. We can deploy a very simple nginx image and expose it on a NodePort type. You’ll need internet connectivity from the network you deployed the cluster to for this to work.
kubectl create deployment nginx --image=nginx
kubectl expose deployment nginx --name=nginx --type=NodePort --port=80
We now confirm the external port and host this pod and service is running on.
kubectl get service nginx
kubectl get pod -o wide

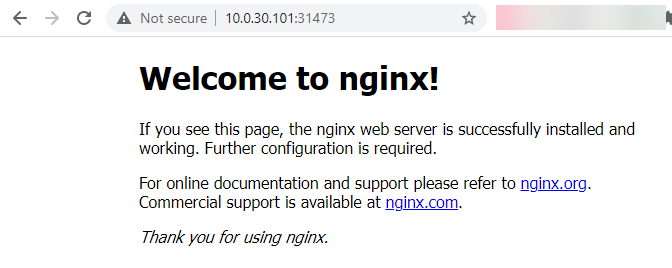
Armed with this information we can connect to the IP address of the management cluster worker node and the port listed above.
Conclusion
So after only a few minutes we now have a fully working Tanzu Community Edition management cluster… well, maybe not a few minutes 🙂 Certainly the most time consuming part is the prep work. Configuring vCenter in this example and setting up a bootstrap client to install from, which in all fairness we skipped in this guide.
Once you do have a bootstrap client and you understand what all the configuration settings are doing, installation is actually fairly straight forward. That goes for both the Tanzu Enterprise editions and the community edition, which are very similar.
Tanzu Community Edition is a great way to get started with Kubernetes. Even if you don’t have a vSphere environment to leverage you can use the other deployment options to deploy into AWS, Azure, or even directly to Docker.
Thanks for the guide , any idea why below error, Not deploying management cluster.
‼ [1104 10:40:53.84034]: init.go:705] Failure while deploying management cluster, Here are some steps to investigate the cause: ‼ [1104 10:40:53.84040]: init.go:706] Debug: ‼ [1104 10:40:53.84070]: init.go:707] kubectl get po,deploy,cluster,kubeadmcontrolplane,machine,machinedeployment -A –kubeconfig /home/tanzu/.kube-tkg/tmp/config_crdT0oSM ‼ [1104 10:40:53.84072]: init.go:708] kubectl logs deployment.apps/ -n manager –kubeconfig /home/tanzu/.kube-tkg/tmp/config_crdT0oSM ‼ [1104 10:40:53.84078]: init.go:711] To clean up the resources created by the management cluster: ‼ [1104 10:40:53.84187]: init.go:712] tanzu management-cluster delete ✘ [1104 10:40:53.86746]: init.go:86] unable to set up management cluster, : unable to wait for cluster and get the cluster kubeconfig: error waiting for cluster to be provisioned (this may take a few minutes): timed out waiting for cluster creation to complete: cluster control plane is still being initialized
I have the same error message as yours…
Thanks for the guide, very helpful. I think you’re just missing the command to create the nginx deployment?
You’re right. I didn’t have the correct kubectl create command. I’ve corrected that. Thanks!