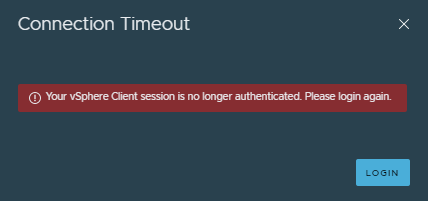
This weekend I finally got around to updating my vCenter to vSphere 7 Update 2 (Build 17694817). Shortly after the update I noticed that my idle session timeout, which I modified, was once again kicking in after a few hours.

I was all set on writing an updated post on how to update the session timeout value in the webclient.properties file on the vCenter server, when I almost fell out of my chair. To my surprise the vSphere Client UI now has the Session Timeout value configurable inside it. Interestingly enough though, you won’t find this in the Release Notes.
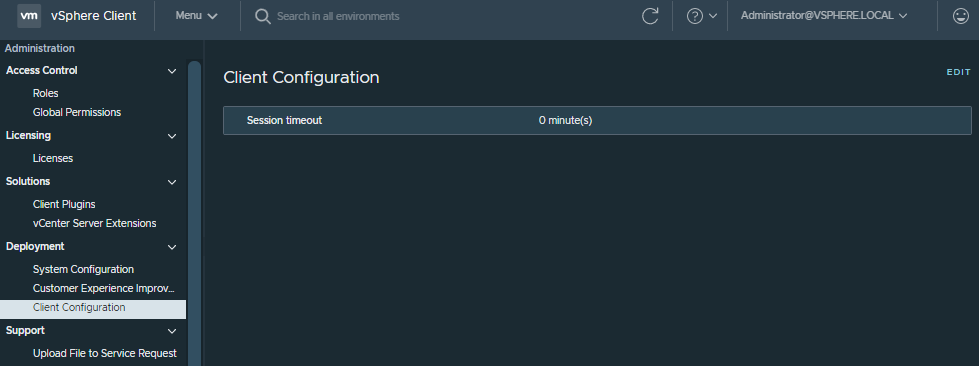
You’ll find the Session Timeout setting under the menu Administration / Deployment / Client Configuration.
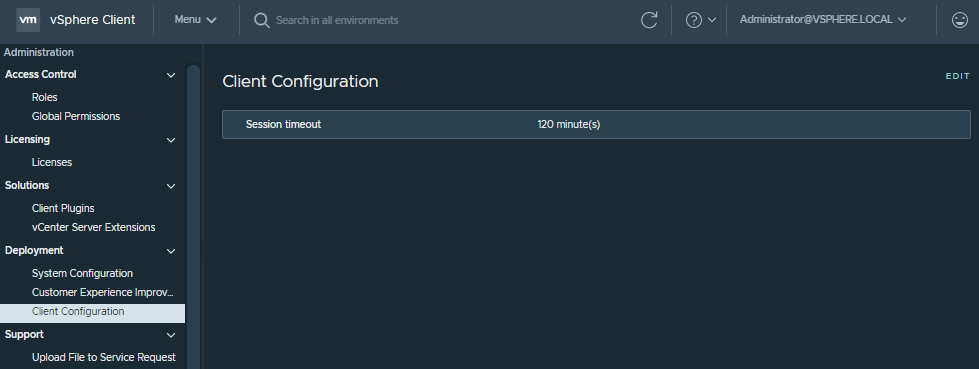
Modifying the value is straight forward. Click the Edit button in the top right of Client Configuration. Enter in a new value, in minutes, and click Save.
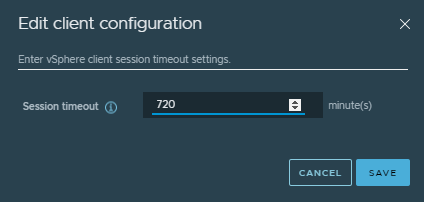
So for an idle session timeout of 12 hours you would put in 720 minutes. For the setting to take effect you just need to logout of the vSphere Client and re-login.
Now unfortunately you can’t make this setting zero minutes via the UI. Zero, representing no idle session timeout.

Though that doesn’t mean you can’t revert to the old method of using the CLI to change the session timeout and set it to ‘0′. In effect giving you a no idle session timeout.
Disabling the Session Timeout
Open a console window to the vCenter appliance or using a Shell prompt SSH to vCenter. At the prompt type Shell. This will take you to the BASH shell on the appliance.
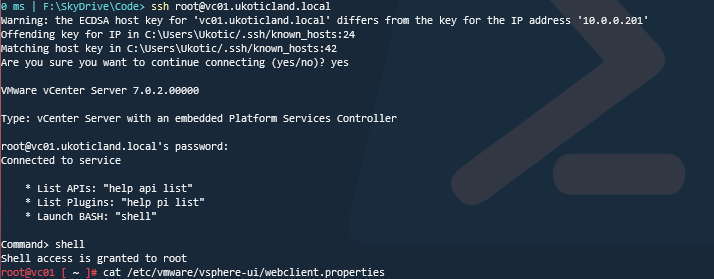
From here you can view the webclient.properties and confirm the session.timeout value using the cat command.
cat /etc/vmware/vsphere-ui/webclient.properties
You should find something similar to session.timeout = 120 as this is the default value in minutes.
Make a backup copy of webclient.properties.
cp /etc/vmware/vsphere-ui/webclient.properties /etc/vmware/vsphere-ui/webclient.properties.bak
Now edit the file with VI
vi /etc/vmware/vsphere-ui/webclient.properties
Press i to enter insert mode. Locate session.timeout and change it to session.timeout = 0
Then press escape to exit insert mode and type in :wq! and press enter to save and quit VI.
In the past you would have had to restart the vSphere UI service but now all you need to do is logoff your current session and re-login to the vSphere Client.
Checking the Session timeout value again in the UI you should now see 0 minutes.
Conclusion
The Session timeout setting is a great welcome addition inside the vSphere Client UI. I have been patiently waiting for the setting to be included in the UI for a very long time now. Unfortunately you can’t disable or turn off the session timeout in the UI. To achieve this you still need to revert back to the old CLI method of editing the webclient.properties file.
What about for the SSH session timeout?
Timeout can’t be changed from the UI for SSH
From my initial testing, it appears that Jan 27 2022’s vSphere 7 Update 3c VCSA ignores the value of 0 and still logs off vSphere Client after 2 hours, but VAMI stays connected. Even though the UI allows a range of 1 to 1440 minutes (24 hours), I’m giving 9999 a try and will see what happens.
Great article, thank you so much for your work!
Not sure why that might be. To confirm, I have upgraded to vCenter 7.0 U3c and I can run with a disabled timeout using ‘0’ as the value. I also tried setting the value to 5 minutes to confirm it was working and then went back to 0 which has disabled the timeout once again. You don’t need to restart any services for this change to take effect but I would consider restarting the client UI or rebooting the appliance if the change isn’t working for you. Otherwise I don’t know why this might be the case???
Thanks for the feedback!
Great article, thank you so much for your work!
Great article, thanks, bro! it helped me on VCenter 7
but to sad to say that its not working on VCenter 8 🙁